HDPE Geomembrane That Keeps Containment One Step Ahead

In this guide

What you will learn about HDPE geomembrane

Why an HDPE geomembrane makes containment more reliable

Where an HDPE geomembrane makes the biggest difference

What to consider before choosing a lining solution

Answers to frequently asked questions

HDPE Geomembrane That Keeps Containment One Step Ahead

Did you know?

Up to 10% of a farm dam’s stored water may be lost through seepage each year.

Source: Agriculture Victoria

When you want valuable water or any sort of industrial liquid contained, what lies beneath the surface matters just as much as what sits above it. Overlooking a leak can lead to water loss, ground contamination and costly containment challenges. This is where an HDPE geomembrane can make a difference.

The question is how?

Designed to provide a low-permeability barrier, this specialised lining material is used in applications ranging from farm dams and reservoirs to landfills and mining facilities. However, reliable containment depends on more than choosing a strong material; site conditions and installation quality both play an important role.

Why does an HDPE geomembrane make containment more reliable?

An HDPE geomembrane makes the containment of water more reliable by creating a low-permeability barrier that helps prevent liquids from seeping into the surrounding soil.

High-density polyethylene is used for water storage, landfill systems and industrial containment, where controlling liquid movement is essential. A few factors make a great difference:

Factors Description
Reliable seepage control Natural soil can allow water and other liquids to migrate underground. An HDPE geomembrane provides a constant barrier that reduces seepage and helps keep dams useful.
Resistance to demanding conditions HDPE geomembranes offer good chemical resistance and durability when correctly specified for the application. These properties often make them suitable for challenging environments, including waste management and mining.
Long-term containment A reliable lining system needs a more durable material. Proper ground preparation and secure seam welding can contribute to performance and help reduce risk.

Key takeaway

Ultimately, choosing the right HDPE geomembrane means considering the site, the material being contained and the quality of installation.

Not sure which liner suits your site?

Contact Our Team

Where can HDPE geomembrane make the biggest difference?

An HDPE geomembrane makes the biggest difference wherever water retention and environmental containment are essential. From agricultural dams to industrial facilities, HDPE liners provide a low-permeability barrier that keeps the liquid contained and protects the surroundings. How an HDPE lining system performs often depends on site conditions, material compatibility and installation quality.

Here are three applications where it delivers practical value:

Farm dams and water storage to prevent leaks

Every drop of water counts. An effective dam liner can help reduce seepage through permeable ground, and HDPE liners are used in farm dams and storage ponds to support more reliable water retention.

Landfills and tailings dams where containment matters most

Waste management and mining operations use carefully engineered barriers to help prevent unwanted liquid migration. Landfill liners support leachate containment, while tailings dam liners can help control seepage.

Industrial storage where reliable protection is essential

Industrial facilities often need specialised containment to store liquids, and that need is what companies like GDT Lining are built around.

Where GDT Lining fits

The core service lies in providing controlled barriers tailored to the demands of water storage and waste management, while supporting more reliable performance.

Final thoughts

What lies beneath the surface is important, but the containment system is what makes the difference between a site that performs reliably and one that struggles with seepage and environmental risk.

An HDPE geomembrane offers practical solutions for applications ranging from farm dams and water storage to industrial containment. The right liner thickness and site preparation both contribute to a dependable HDPE lining system.

With the right plan, you can protect valuable resources while avoiding leaks.

Before choosing a lining solution, consider

1

What needs to be contained

2

The conditions the liner needs to endure

3

The level of protection your site requires

Frequently asked questions (FAQs)

How long does an HDPE geomembrane last?

An HDPE geomembrane can provide long-term containment, depending on the material quality.

What thickness of HDPE liner is best for a dam or landfill?

The appropriate HDPE liner thickness depends on the site conditions, expected loads and engineering specifications.

Is an HDPE geomembrane suitable for landfill and mining applications?

Yes, HDPE geomembranes are widely used in landfill liners, dams and mining facilities.

Looking for a lining solution for your project’s needs?

Tell the GDT Lining team what needs to be contained, the conditions on your site and the level of protection you require.

What Quality Control Tests Should Be Performed During Dam Liner Installation?

Even the best Dam Liners out there won’t work properly if they’re not installed and tested the right way. Quality control isn’t just something you check off at the end of a project, it’s actually what tells you the material’s holding up, the seams are strong enough, and the whole system’s going to do its job before anything gets put into service. This piece goes through the main quality control tests that come up during dam liner installation, why each one actually matters, and how they all work together to cut down the risk of leaks and keep things reliable for years afterward.

Why Quality Control Is Essential During Dam Liner Installation

▪️Reducing the Risk of Future Failures

Good QC catches problems while they’re still cheap to fix. It stops leaks and seepage before they start, flags issues while there’s still time to sort them out, and just makes the whole system hold up better in the long run.

▪️Ensuring Compliance with Project Specifications

Every project has engineering requirements it needs to meet, and usually regulatory rules on top of that. Quality control’s what actually confirms the installation’s meeting those requirements instead of just hoping it does.

▪️Subgrade Preparation and Verification

▪️Testing the Subgrade Before Installation

Before any liner goes down, the ground underneath needs real attention first. Compaction testing and checking moisture levels tell you whether the subgrade can actually hold up what’s going on top of it. Sharp objects, debris, uneven spots, all of that needs clearing out beforehand, because leaving it there just causes problems later.

Why Subgrade Quality Affects Liner Performance

A badly prepped subgrade is one of the biggest reasons liners end up with punctures or stress points down the line. People tend to treat this part as just prep work rather than an actual quality check, but it needs the same level of attention as anything happening above it.

▪️Material Inspection Before Installation

▪️Verifying Material Specifications

Before installation even kicks off, the material itself needs checking. That means making sure the thickness matches what was actually specified, keeping track of roll identification so everything’s traceable, and going over manufacturer certifications to confirm it’s all what was actually ordered.

▪️Checking for Manufacturing or Transport Damage

Rolls of liner can get damaged before they even show up on site, surface defects, tears, punctures, scrapes from being handled or shipped around. A proper check at this stage, including how it’s been stored, catches this stuff before it becomes a hidden problem later.

Environmental and Equipment Conditions for Installation

▪️Weather Conditions During Seam Welding

Seam quality really depends on the conditions it’s welded in. Temperature, humidity, moisture, all of it affects how well a seam actually holds together. Scheduling needs to account for this, because welding seams in bad weather is a real reason this kind of work fails.

▪️Welding Equipment Calibration

None of the seam testing later matters much if the welding equipment wasn’t calibrated properly to begin with. It needs regular calibration checks, and it needs to be run by people who actually know what they’re doing. This is really what everything else gets built on.

Field Seam Quality Control Tests

▪️Non-Destructive Seam Testing

Non-destructive testing lets you check the seams without actually damaging the liner. Air pressure testing works well for dual-track seams, and vacuum box testing’s another common one, both aimed at spotting weak points in a seam without cutting into anything.

▪️Destructive Seam Testing

Destructive testing actually takes a sample out and puts it through peel and shear strength testing to confirm it can handle real pressure. This doesn’t happen on every single inch of seam, there are set frequencies and acceptance criteria for how often and where this gets done.

▪️Recognised Testing Standards

Seam testing on Dam Liners usually follows recognised industry standards rather than whatever method someone feels like using. Sticking to these standards isn’t just ticking a box, it’s what actually gives a project credibility and keeps it in line with what regulators and engineers expect to see.

Thickness and Dimensional Verification

▪️Confirming Material Thickness

Thickness gets checked against what the project specs actually call for, and staying consistent matters just as much as hitting the right number. Even thickness across the whole liner is what keeps performance predictable.

▪️Checking Panel Alignment

Proper overlap between panels, seams that stay consistent, and keeping wrinkles to a minimum all get checked here. Even small issues at this stage can turn into bigger problems once the liner’s actually under load.

Visual Inspection Throughout Installation

▪️Surface Condition Assessment

Visual checks throughout the whole process look for cuts, punctures, creases, and anything that might’ve ended up underneath the liner before it gets covered or put into use.

▪️Installation Workmanship

Beyond just the material, how well the job’s actually done matters too, proper anchoring, smooth placement without creating unnecessary stress points, and seams lined up correctly, all of this gets checked as the work goes on.

Anchor Trench and Edge Inspection

▪️Verifying Anchor Installation

The anchor trench has to be dug to the right dimensions, and the liner needs to be anchored securely inside it. This is what actually stops the liner from shifting around once it’s dealing with real conditions on site.

▪️Edge Protection

How the backfilling’s done and how well the edges are protected matters a lot for stopping uplift from wind or water. Even a liner that’s installed perfectly everywhere else can get compromised if the edges aren’t secured properly.

Repair and Defect Verification

▪️Testing Repaired Sections

If a defect’s found and gets repaired, whether it’s a patch or a seam that’s been re-welded, that fix needs to go through its own testing too. A repair nobody’s actually verified is just a guess that it worked, and it needs to hold up to the exact same standard as the original installation before anyone signs off on it.

Who Performs Quality Control Testing?

▪️Installation Crew vs Independent CQA

QC testing can be done by the crew doing the installation, or brought in through an independent Construction Quality Assurance team hired specifically for this. On bigger projects especially, having independent third-party testing is often required, or at least strongly pushed for, since it brings a level of objectivity that testing done in-house just can’t fully match.

Documentation and Quality Assurance Records

▪️Recording Test Results

Every test that gets run needs to be written down properly, seam test reports, material inspection records, daily logs from the installation, all of this together builds a full quality assurance trail.

▪️Traceability and Final Acceptance

Roll numbering, test certificates, inspection checklists, final documentation, all of it ties together to confirm the installation’s actually met the standard before final sign-off happens.

Monitoring After Installation
Post-Installation Verification

Quality control doesn’t just end once installation’s done. Leak detection systems and regular inspections after the liner’s up and running help confirm it’s still doing its job over time, instead of just assuming it’s fine because it passed the initial tests.

Common Quality Issues Found During Dam Liner Installation

Some problems show up again and again on these projects. Poor seam welding’s one of the most common. Wrinkles that turn into stress points over time is another. Subgrade that wasn’t prepped properly causes issues that often don’t even show up until much later. Mechanical damage during installation, whether from equipment or just careless handling, comes up a lot too. And incomplete testing or missing documentation leaves gaps that can turn into real liability if something goes wrong down the road. Keeping an eye out for these throughout a Dam Liners project goes a long way toward avoiding expensive problems later.

Frequently Asked Questions

a.How are dam liner seams tested for quality?
Seams get tested both ways, non-destructive methods like air pressure and vacuum box testing, and destructive methods like peel and shear strength testing on samples, to confirm they actually meet the strength and integrity standards required.

b.What happens if a seam fails testing?
It gets repaired, usually through re-welding or a patch, and then tested again to confirm the fix actually holds up to the same standard as the rest of the installation before it gets accepted.

c.How long does QC testing typically take during installation?
Depends on how big the project is and how many seams are involved, but generally it runs alongside the installation itself rather than being some separate phase tacked on at the end, so it adds time gradually instead of all at once.

Conclusion
Proper quality control testing is genuinely a critical part of any Dam Liners installation project, it’s what actually confirms the material’s good, the seams are solid, and the workmanship holds up before the system’s ever put into service. Bringing together material inspections, both non-destructive and destructive seam testing, ongoing visual checks, and proper documentation makes a real difference in how the system performs down the line and cuts down the odds of expensive repairs later. If you’re managing a project that involves dam liners, it’s worth working with suppliers and installation teams, like GDT Lining, who actually know what they’re doing and follow proper quality assurance procedures at every stage, not just at the end.

Why Does a Farm Dam Lose More Water Than Evaporation Alone?

All dams lose water due to evaporation, which is expected when running a dam. However, if you observe rapid water loss even though the weather is dry and despite having had adequate rainfall, chances are that there is another cause for the problem.

High water loss could be due to several reasons: seepage, overly permeable soil, structural weakness, poor previous construction, or faulty/absent dam liner. This article will highlight the amount of evaporation that should be expected, possible causes of the excess water loss, ways to determine whether there is a problem and how to diagnose the issue yourself, and role of the dam liner in solving it.

How Much Water Loss from a Farm Dam Is Normal?

Natural Evaporation Explained

Any exposed water surface will always experience evaporation – that’s just how physics works, no cause for concern here. The real question is, what’s the acceptable rate of evaporation in your case, for this dam, in your weather conditions?

Seasonal Weather Patterns

The rates of evaporation increase in summer and decrease in winter. Any drop which may seem alarming in January is normal for the season.

Wind, Temperature, and Humidity

A hot, dry, and windy weather pattern draws out much more water from a dam compared to cold, humid days. All three elements come into play, and a combination of a heatwave with wind may very well explain a sudden drop.

Why Do Water Levels Naturally Change?

Water levels will vary depending on how much rain falls, how much water evaporates and the amounts used for domestic or agricultural needs. Some change is just normal behavior.

Why Does a Farm Dam Lose More Water Than Evaporation Alone Can Explain?

There are a few common causes that often turn out to be responsible when there’s trouble with the numbers.


Seepage through Soil

Movement of water through the structure itself through to the ground around it, usually unseen from above.

Dam Wall Leakage

Leakages in the actual wall of the dam, possibly due to its aging process but even from poor construction techniques when first built.

Foundation Seepage

Movement of water through the dam through its foundation rather than through its walls.

Structural Weaknesses

Areas of the structure that were built in such a way as not to meet proper standards – weak areas, poor compaction and grading.

Inadequate Construction Procedures

Dams that have never been properly compacted or built with an inadequate soil mix are usually fated for leakage no matter how well-maintained they become later.

Dam Liner Damage

If a dam liner has at some point been damaged, deteriorated or improperly installed in the first place, then this will almost certainly account for most of the problem.

Each of these needs examination on its own terms, as the solution varies accordingly.

What Causes Water to Seep Through a Farm Dam?

Sandy or Highly Permeable Soils

Water retention by sandy soils in the way that happens in the case of clay soils is impossible due to the sizes of particles, which are large in the first case, and the soils are highly permeable.

Not Enough Clay in the Soil

Sometimes there may be soil that looks fine but has not enough clay to create a solid structure and withstand water.

The Appearance of Cracks in Dry Soil

Dry soil cracks, and cracks create a channel that water will move through once the reservoir gets filled again.

Penetration of Tree Roots

Tree roots can create gaps in the dam when growing or dead, leaving tunnels through the dams.

Settlement of the Dam

Dams settle over time, and therefore there appear gaps in places where initially there were no gaps at all.

How Can You Tell Whether Water Loss Is Evaporation or a Leak?

Comparing Seasonal Evaporation Rates

Find typical evaporation rates in your area and for your season of the year and compare them to the levels of evaporation you are observing. If your water level is dropping significantly more than that, there is probably another reason.

Monitoring Daily Water Levels

Marking your water level and measuring it on a daily or a weekly basis will give you a much better idea than guessing from time to time.

Finding Wet Spots Around the Dam

Wet spots, lush or unusual vegetation around the walls of your dam or soggy soil nearby indicate a seepage problem.

Inspecting Downstream Embankments

Often, seepage appears on the downstream embankment first before showing up elsewhere, so a walk is recommended after the full dam especially.

Determining a Sudden Drop in Water Level

A gradual decrease in water level that correlates with hot weather is normal. A sudden drop, however, is not.

Calculating a Water Balance

It’s just math! Comparing how much rain goes in, how much you expect to evaporate, and how much water you take out for livestock or irrigation and figuring out what’s left. It’s one of the more reliable ways to determine if there is actually a problem.

Here’s a quick way to narrow down what you might be looking at:

What You’re Seeing Likely Cause What it Suggests
Slow, steady drop, worse in summer Normal Evaporation Usually not a problem
Rain drop that doesn’t match the weather Seepage or leak Worth Investigating further
Wet Patches or lush grass below the wall Dam wall or seepage leak Needs closer inspection
Sudden overnight drop Structural failure or burrow Needs prompt attention
Consistent loss across every season Soil permeability issue May be worth considering a liner

This is a general guide to help you narrow things down, not a diagnosis on its own — a proper site inspection is still the reliable way to confirm exactly what’s happening.

Why Your Soil Type Matters More Than You Think for Dam Water Loss

Clay Soils

Clay is the preferred material for building dams since it combines well and has natural resistance to water flow.

Sandy Soils

Sandy ground is the opposite — it lets water through relatively easily no matter how well it’s compacted, which is often why sandy-soil dams struggle to hold water long-term.

Rocky Ground

Rock can create unpredictable seepage paths, since water finds its way through fractures and gaps rather than moving evenly.

Mixed Soil Profiles

A lot of dams sit on a mix of soil types across the site, which means seepage can be worse in one section than another — patchy, rather than uniform.

Expansive Soils

Soils that swell and shrink with moisture can crack open during dry spells and create new pathways for water loss each time the cycle repeats.

A Quick Example

Dam A: Water levels dropped around 15cm a week through a hot summer stretch — which looked alarming at first. But running a proper water balance calculation showed only about a third of that drop matched expected evaporation for the conditions. The rest turned out to be seepage through a sandy patch on the dam floor that had never been dealt with.

Dam B: A neighbouring dam of a similar size, sitting through the same weather, showed a comparable seasonal drop — but this one lined up almost exactly with local evaporation estimates. No wet patches, no unusual growth downstream, nothing to chase up.

Same weather, similar dams, two very different explanations. It’s a good reminder that comparing your water loss to what evaporation should actually account for — rather than just watching the level drop and assuming the worst (or the best) — is what actually tells you what’s going on.

What Types of Dam Liners Are Available?

A “dam liner” is not a single item. There are several different types of liners which will depend on both the dam itself and the budget you have.

HDPE Liners

HDPE liners are best when you need something that is very durable and reliable, especially in the case of bigger dams and when water conservation is important.


Bentonite/Clay Liners

If necessary, bentonite can be applied either as a lining material or added to the soil in order to increase its clay content and decrease its permeability – an inexpensive solution for smaller dams.

PVC Liners

PVC liners are less expensive and easy to install compared to HDPE liners, but are less reliable and less durable in the long run, especially when exposed to sunlight.

Sprayed or Composite Lining Systems

Some areas may require the use of sprayed or composite lining systems which include a number of different materials combined into a layer.

It’s difficult to say that there is one universal solution – it all depends on your soil and dam size.

When Does a Dam Liner Become the Better Solution?

Seepage Problems That Persist

In case seepage is continually appearing regardless of any maintenance efforts taken, a liner may be the better solution.

Poor Ground Conditions

Where sandy, rocky, or just plain difficult soil exists which doesn’t compact easily at all, this will be a sure sign that a liner will prove better than trying to make do with natural soil.

Necessity for Water Conservation

Water conservation is a serious problem in some areas, and therefore where every drop counts, a liner will be more justified.

Irrigation Water Storage

Water stored for purposes of irrigation will need to be properly conserved since it is meant for the irrigation process.

Stock Water Supply

In order to have a water supply for livestock, it will be necessary to ensure this through a liner.

Long Term Purpose of Water Retention

In case the dam is intended to last for many years to come, a liner is the best solution.

How Does a Dam Liner Reduce Water Loss?

Creating a Sealed Barrier

The reason why a liner for a dam creates a barrier is that it physically separates the water from the soil beneath it rather than making the soil impermeable itself.

Preventing Seepage through Soil

Because the barrier doesn’t work by increasing soil density, it will continue functioning regardless of the soil being leaky.

Adjustment to Various Soils

A good quality dam liner can perform equally well on sand, clay or mixed soils – an advantage that soil alone cannot offer.

Water Storage Potential for a Dam

A liner for a dam makes seepage minimal, and thus increases water storage capacity in the dam over time, unlike soil that slowly loses efficiency.

Service Life of the Liner

A well installed dam liner when maintained properly has a service life of many years – much longer than expected by farmers.

Performance under Extreme Conditions

Dam liners used in open dams are constantly subject to external factors such as heat, UV and frost. This has to be taken into consideration when choosing materials and installing a liner.

What Other Factors Can Increase Water Loss?

Wall Cracking of Dam

Cracks that may occur in the wall itself, due to either drying or settlement processes, result in direct conduits through which water could escape.

Overflow Structure Problems

A badly designed or degraded spillway could end up leaking water that isn’t even seepage in any way.

Bad Compaction

Areas of the dam which were not compacted correctly during construction remain weak spots for many years.

Vegetation Encroachment

Roots and thick vegetation that grow into the dam embankment slowly create cracks.

Large Animal Activities

It’s not only burrowing animals that cause trouble; other large animals accessing the dam will erode its banks.

Groundwater Changes

Changes in the groundwater of the area will affect the movement of water through the dam in unseen ways.

Can Farm Management Practices Influence Water Retention?

Vegetation Control

Proper vegetation control around the dam is necessary to ensure that there is no root damage to the dam and to facilitate problem detection.

Livestock Access Management

Uncontrolled access by livestock may cause erosion on the banks and disturb the dam floor; thus, drinking access by stock needs management.

Routine Inspections

Inspection involves walking around the structure from time to time to detect small defects such as cracks, wet areas, and entrance of burrows.

Sediment Management

Sediment accumulation may interfere with storage capacity and effectiveness of the liner/soil barrier.

Embankment Protection

Erosion prevention and minimization of heavy truck traffic are just some examples of methods for embankment protection.

Is It Safe for Livestock to Access a Lined Dam?

Controlled Livestock Access without Injury to the Liner

The hooves of livestock could eventually destroy the liner because of unrestricted access to the soft ground near the shores.

Use of Fencing and Defined Drinking Points

The farmer would put up a fence around the area that is lined and have a defined drinking point for the livestock.

Access Points for Animals and Wildlife

In situations where access is required, an appropriately constructed access point will allow the livestock and wildlife to drink without constantly stepping on the liner.

Prevention of Punctures by Machinery and Hooves

Livestock are not the only things that could puncture the liner.

How Do Professionals Investigate Unexplained Water Loss?

Site Survey

Walkover survey of the dam site, including an inspection of the embankments, the wall and any signs of seepage.

Soil Survey

Soil survey in order to establish how permeable the soil is and what percentage of the soil is clay, as this will be important in understanding whether the problem is coming from the soil itself.

Embankment Survey

Structural survey of the walls, to check for any evidence of cracking, erosion and/or settlement.

Methods of Leak Detection

Depending on the situation, water balance calculations, visual tracer method, or specialized leak detection equipment may be used.

Assessing Current State of Dam Liner

If there is a dam liner present, assessing whether it is punctured, lifted or has otherwise degraded is an essential part of the process.

Recommendation of Solutions

Based on the results of all the surveys above, a decision will be made on whether the repair will involve maintenance or repair/relining.

Are There Regulations or Water Rights Considerations to Be Aware Of?

Dam Safety Regulations Based on Capacity

Large dams that exceed a minimum capacity may be regulated by dam safety regulations that impact what work can be done and how it is done.

Water License Conditions

Based on the area in which you operate, the conditions of your water license may include considerations relating to dam capacity, usage, or alteration.

Catchment Authority Consent

Catchment authorities may require consent prior to undertaking projects such as relining, especially if the dam exceeds a certain capacity.

When to Consult Prior to Work Commencement

It’s always worthwhile checking with your local catchment authority before embarking on any major project – it’s better to know up front rather than halfway through.

Can a Dam Liner Be Installed in an Existing Farm Dam?

Lining of Existing Dams

Yes – there are numerous cases where dams that did not have any lining to start with eventually get retrofitted with a lining due to persistent seepage problems.

Site Preparation

Generally speaking, the dam has to be drained (at least in part), and its base cleared from debris and properly prepared before installing the lining.

Issues With Installation

There is an array of obstacles connected with installation of a lining, including existing structures, inlets and outlets, and uneven terrain. This process is a little more complex than installing a lining in a new structure.

Reducing Operational Interference

One way of reducing the interference of the process on the operation of the dam is choosing the dry season for the installation.

What Does Installing a Dam Liner Actually Involve?

Draining/Partial Drainage of the Dam

This work typically begins with lowering the water level to as low as possible, sometimes completely draining the dam based on the work at hand.

Bottom Preparation and Debris Removal

All sharp materials and any debris that might scratch the membrane lining are cleared out, and the bottom is made level.

Lining the Dam and Securing the Liner

The liner is laid out to cover the necessary area with seams connecting the pieces as required.

Securing the Liner at the Edges

The edges of the membrane are secured, commonly in a trench surrounding the entire structure.

Refilling the Dam and Making It Functional Again

Once all is said and done, the dam is filled, and it is ready to be put back into use again.

This will give you an idea of how this work will go and how long you will have your dam out of commission, but you should discuss this directly with the contractor since this will depend on your specific situation.

What Does a Dam Liner Cost, and How Long Does Installation Take?

There’s no single figure that applies to every dam. Cost depends heavily on the size of the dam, the liner material chosen, how much site preparation is needed, and how easy the site is to access with equipment.

Timeframes vary just as much. Smaller dams with straightforward access can often be relined in a matter of days. Larger dams, or ones needing significant preparation work first, can take considerably longer. As with most things in this article, addressing seepage early — before it gets worse — tends to keep both the scope and the cost of the job smaller than waiting it out.

How Do You Minimize the Loss of Water from Your Farm Dam over an Extended Period?

  • Make sure you monitor your water levels to detect abnormal reductions earlier than later.
  • Don’t allow structural defects to escalate before you get them fixed.
  • Manage your embankments by controlling erosion, vegetation, and livestock.
  • Address any seepage issues early because it would only grow more complicated and costly the more time that passes.
  • Consider employing a dam liner if needed, for example, where there is difficult soil and seepage.

What Does It Take to Keep a Dam Liner in Good Shape?

Controlling sediment build-up

Any sediment collected at the bottom of the lined base may affect its capacity and should be removed from time to time.

Protecting the Liner from Stock and Machinery

Keeping unrestricted stock access and heavy machinery away from the liner reduces the risk of accidental punctures.

Prompt Repairs for Small Punctures

A small puncture caught early is a quick fix. Left alone, it can grow into a much bigger repair job.

Installing a liner isn’t really a “set and forget” job — a bit of routine care goes a long way toward getting the full service life out of it.

When Should You Seek Professional Advice?

It’s worth getting expert eyes on your dam when:

  • Water levels drop rapidly
  • Wet areas appear around the dam
  • Seepage is visible
  • Cracks develop in the wall or embankments
  • Structural movement is observed
  • Water storage reliability becomes genuinely critical to your operation

A professional assessment will confirm what’s actually causing the loss, and a dam liner may come up as one possible long-term solution depending on what they find.

What Should You Ask Before Hiring a Dam Liner Installer?

Worth having answers to before committing to a project:

  • Which liner material is being recommended for your soil and dam size, and why
  • How the dam will be prepared, drained and refilled during installation
  • Expected timeframe and any disruption to water access during the work
  • Warranty terms and expected service life
  • Whether any local water licensing or dam safety approvals are needed first
  • References or examples of similar farm dam projects they’ve completed

Conclusion

Evaporation is a normal, expected part of every farm dam’s water cycle — but when water levels keep dropping faster than the weather can explain, it’s usually a sign of seepage, soil permeability, a structural issue, or a problem with an existing liner. Learning to tell normal evaporation apart from abnormal water loss is really the first step toward protecting a resource that most farms can’t afford to lose. This is where experienced professionals like GDT Lining come into the picture.

Where seepage keeps coming back no matter what maintenance is tried, a properly designed dam liner — matched to your dam’s soil conditions, size and intended use — can offer a genuinely long-term fix, cutting water loss and giving you a more dependable water supply for years to come. As with any major work on farm water infrastructure, it’s worth checking local approval requirements and asking the right questions of an installer before getting started.

What Safety Measures Should Be Followed in Molasses Storage?

Molasses Storage, doesn’t get talked about much compared to other industrial stuff, but it’s actually a big deal across food processing, animal feed, ethanol production, and fermentation work. Given how much it’s used, getting the storage right matters way more than people realize. It’s not just about keeping the product from going bad, it’s about keeping the people around it safe too, protecting the equipment, and not causing problems for the surrounding area. Get this wrong and you’re not just looking at ruined products, you’re looking at accidents, contamination, and expensive damage to your storage setup. Do it right from the start and you avoid all of that, plus your storage systems just last longer.

Why Safety Is Essential in Molasses Storage

Protecting Product Quality

Bad storage conditions let contamination in, mess with consistency, and increase the chances of spoilage. Store it right and molasses stays usable and consistent, store it wrong and it degrades way faster than it should.

Ensuring Workplace Safety

This isn’t just about protecting the product, it’s about the people actually handling it. Safe handling, preventing accidents, keeping workers protected, all of this needs to be baked into how a facility runs its day-to-day storage operations.

Choose the Right Molasses Storage Tank

Select Suitable Tank Materials

Whatever tank you’re using needs to actually hold up against molasses over the long run. Corrosion-resistant materials are non-negotiable, and if it’s meant for food or feed use, you need food-grade coatings too. Bottom line, the material’s got to genuinely work with molasses, not just be whatever’s cheapest or easiest to get.

Ensure Proper Tank Design

A tank that’s designed properly won’t leak, is sized right for how much you’re storing, and lets you actually get in there for inspections and maintenance without a hassle. One thing people skip way too often is thinking about structural load and the foundation underneath. Molasses is heavy, a lot heavier than water for the same volume, and putting a tank on a weak foundation is a genuine structural risk. This isn’t theoretical either, there’s a real history of tank failures involving molasses causing serious damage, so the foundation deserves just as much thought as the tank itself.

Understanding Molasses-Specific Storage Hazards

Fermentation Gas Buildup

Molasses can ferment over time, especially when it’s warm, and that fermentation kicks off gas, mostly carbon dioxide. In a sealed tank, that gas can build up without anyone even noticing until it’s actually a problem. This is one of those risks that gets overlooked a lot, and it’s exactly why proper ventilation and keeping an eye on things matters so much.

Combustible Dust and Vapour Risk

Nobody really thinks of molasses as a fire risk, and fair enough, it’s a thick liquid. But depending on the setup, dried residue or dust from processing can actually create a combustible hazard in certain facilities. Don’t just assume this isn’t a concern, it deserves real attention in any safety plan.

Maintain Proper Temperature and Ventilation

Temperature Control

Keeping the temperature in the right zone stops molasses from getting too thick, keeps it flowing through pumps properly, and slows down quality loss. Go too cold and it’s a struggle to move through pipes, go too warm and you’re speeding up fermentation and degradation.

Ventilation Requirements

Solid ventilation cuts down on moisture buildup, keeps things running safer overall, and stops condensation from forming inside the storage system. It also ties back to that fermentation gas problem, good airflow helps keep gas from building up before it turns into a real hazard.

Seasonal and Climate Considerations

Temperature shifts across seasons put different kinds of stress on tanks and change how the molasses behaves inside them. Summer heat can speed up thickening and fermentation risk, winter cold makes it harder to pump. Whatever monitoring you’re doing should shift along with the seasons instead of staying the same all year. 

Prevent Contamination During Storage

Keep Tanks Clean

Sticking to a regular cleaning schedule, clearing out residue and sediment, and keeping proper hygiene standards all help keep the product contamination-free while it’s sitting in storage.

Seal Storage Systems Properly

Tanks need a proper seal to keep dust, insects, and water out. Any gap in that seal is basically an open door for something unwanted to get in.

Perform Regular Inspection and Maintenance

Inspect Tanks and Equipment

Regular checks should look for corrosion, keep an eye out for leaks, and go over the valves and fittings closely. Catch the small stuff early and you avoid it turning into something much worse.

Maintain Pumps and Pipelines

Keeping pumps and pipelines in good shape stops blockages, keeps product moving smoothly, and lets you catch wear and tear before it actually fails on you.

Confined Space Entry Procedures

If anyone ever needs to physically climb into a molasses tank to clean it or check something, that’s not routine maintenance anymore, that’s a high-risk situation and needs to be treated that way. Test the gas levels before anyone goes in, make sure there’s proper ventilation, get the right entry permits sorted, and have someone standing by outside. Given the fermentation gas risk we already talked about, this isn’t a step anyone should be rushing or skipping.

Follow Safe Handling Procedures

Train Personnel

Staff need real training, not just a quick rundown, on how to handle things safely, run equipment properly, and respond when something goes wrong. And emergency response training shouldn’t be some generic checklist either, it needs to actually cover what’s relevant to molasses storage specifically, spill response, what to do if someone’s exposed to gas, and fire safety for that particular facility.

Use Appropriate Personal Protective Equipment (PPE)

Gloves, safety footwear, eye protection, protective clothing where it’s needed, all of this cuts down the risk of someone getting hurt or exposed during handling or maintenance.

Spill Containment and Emergency Preparedness

Secondary Containment Systems

Bundling or containment walls around tanks exist for good reason, they stop a spill or overflow from spreading through the facility or getting into the environment. Every molasses storage setup should have this as a basic safeguard, not an afterthought.

Regulatory and Compliance Standards

Depending on where you’re operating and what the molasses is actually used for, there are usually specific safety regulations, environmental rules around spill prevention, and food safety standards if it’s food-grade. Staying compliant isn’t just paperwork for the sake of it, it’s genuinely part of running things safely.

Monitor Storage Conditions

Check Product Levels

Not overfilling tanks and keeping them within safe capacity sounds obvious, but it’s a simple thing that needs checking daily.

Record Routine Inspections

Keep proper logs, maintenance records, temperature checks, inspection schedules, all of it. It matters for accountability and for tracking things over the long haul. Worth keeping Safety Data Sheets on hand too for whatever molasses you’re storing, that’s just standard practice for this kind of operation.

Common Mistakes to Avoid in Molasses Storage

A handful of mistakes cause most of the headaches facilities run into. Skipping routine maintenance until something actually breaks is a big one. Letting contamination sneak in through bad sealing or dirty tanks is another. Using tank materials that just aren’t right for molasses leads to corrosion and product problems down the line. Overfilling pushes the whole system past what it’s built to handle. And putting off repairs once you’ve already spotted a leak or corrosion just turns something small and fixable into something big and expensive. Avoid these and you’re most of the way to doing molasses storage properly.

Frequently Asked Questions

a. How long can molasses be safely stored?

With the temperature, ventilation, and tank maintenance all done right, molasses can sit in storage for months without losing much quality. Exactly how long depends on the conditions and the grade of molasses you’re dealing with.

b. What temperature should molasses be stored at?

Somewhere in a moderate range, warm enough that it stays pumpable, but not so warm that fermentation or degradation speeds up. The exact number shifts depending on the type and what it’s being used for.

c. Is molasses storage a fire or explosion hazard?

Molasses on their own aren’t flammable, but dried residue or dust from processing in certain setups can create a combustible risk. Worth factoring into your safety planning rather than just assuming it’s not an issue.

Conclusion

Safe molasses storage really comes down to getting a bunch of things right together, the right tank, keeping it clean, managing temperature and ventilation properly, staying on top of inspections, and following handling procedures that actually account for what molasses specifically brings to the table. This is where experts like GDT Lining come into the picture.  Get all this right and you’re protecting product quality, keeping things running smoothly, and saving yourself from maintenance costs that pile up from neglect. If your facility deals with molasses, it’s worth putting the money into a properly designed storage system and staying ahead of maintenance, instead of waiting for something to go wrong first.

Do Dam Liners Need a Protective Cushion Layer Underneath?

Ever heard of a brand new liner failing within its first year, even though it was made from genuinely good material? Happens more than you’d think, and honestly, it’s almost never the liner itself that’s the problem. It’s what was sitting underneath it that nobody paid enough attention to.

Dam Liners are only ever as good as whatever’s supporting them. Lay a top-quality geomembrane straight over rough, uneven ground and it’s at risk from day one, which is exactly why this whole cushion layer question matters way more than people first assume.

What Is a Protective Cushion Layer?

A protective cushion layer is basically a buffer, something installed between the ground the dam’s actually sitting on and the liner itself. Usually that’s non-woven geotextile fabric, sand, or fine soil, and its whole purpose is just to sit there between the liner and whatever underneath it could tear or wear it down.

Simple idea, but it’s genuinely one of the most overlooked steps in the whole process, mostly because once everything’s finished and buried, you can’t see it anymore.

Why Dam Liners Are Vulnerable Without Proper Protection

Sharp stones, exposed roots, random debris sitting under a liner, all of that creates real puncture risk, and it really doesn’t take much. Even one small stone pressing up against a geomembrane, with water pressure bearing down on it constantly, can wear straight through over time.

Here’s the scary part though. A liner doesn’t always fail all at once. Sometimes it fails slowly, a tiny puncture lets a little seepage through, and that goes completely unnoticed for months, sometimes years, until it’s turned into a genuinely serious problem instead of something small and easy to fix.

What Happens If a Cushion Layer Is Skipped?

Skip this step and puncture risk goes up a lot, both while you’re installing it and for the whole rest of the liner’s working life. Small damage that nobody notices tends to turn into long-term seepage, and by the time that seepage’s actually obvious, you’re usually staring down expensive repairs, or worse, a full liner replacement.

Honestly, this is one of the most common causes of a liner failing early, and it’s completely avoidable. It’s not a materials problem. It’s a preparation problem, plain and simple.


Types of Protective Cushion Layers Used in Dam Lining

  • Geotextile Cushion Layers

Non-woven geotextile fabric is the go-to solution these days, and for good reason. It’s built specifically to resist punctures, and different weights and thicknesses come with their own rated puncture resistance, so installers can actually match the fabric to whatever the site throws at them.

  • Sand or Fine Soil Layers

Sometimes granular material gets used instead of geotextile, or alongside it, depending on the site. It works fine in certain situations, but generally it just doesn’t protect as consistently as geotextile does, especially on sites where the ground’s sharper or more unpredictable.

  • Composite Protection Systems

Some projects combine geotextile with the geomembrane itself into one single protective setup. You’ll usually see this on bigger or higher-risk projects, where a liner failure would be serious enough to justify spending more on extra protection.

Does Every Dam Liner Project Need a Cushion Layer?

Some site conditions basically demand a cushion layer, rocky ground, uneven surfaces, tree roots, all of that ramps up puncture risk fast. A genuinely well-prepared site, smooth and clear of debris, does carry less risk though.

That said, “usually needed” isn’t quite the same thing as “always needed,” and that call really should come from an actual site assessment, not just a gut feeling either way. Honestly, skipping the assessment itself is often the riskier move, even more than skipping the cushion layer on a site that genuinely doesn’t need one.

How Cushion Layer Thickness and Material Are Determined

A few things drive this decision. How rough the ground actually is gets assessed to understand real puncture risk. The liner’s material and thickness matter too, thinner liners generally need more protection than thicker, tougher ones. And expected water pressure on the liner factors in as well, since more pressure just makes even a tiny puncture a bigger deal.

Cushion Layers and Dam Liner Lifespan

Proper protection genuinely stretches out how long HDPE, LLDPE, and GCL liners actually last. The difference in failure rates between protected and unprotected installs is honestly significant, protected liners tend to reach their full expected lifespan, while unprotected ones often give out well before that.

Compare that against the cost of a full liner replacement or a major repair job, and a cushion layer ends up saving money over the life of the project, it’s not some extra cost tacked on just to be cautious.

Common Mistakes When Installing a Cushion Layer

A handful of mistakes keep showing up across the industry. Using geotextile that’s undersized or just not rated properly for the site’s actual puncture risk. Leaving gaps in coverage instead of protecting the whole area consistently. Skipping the cushion layer altogether on spots assumed to be “low-risk” that turn out to be anything but. And poor ground preparation underneath the cushion layer itself, which undoes the protection even when the cushion material’s genuinely good quality.

How Cushion Layers Fit Into the Full Dam Lining Installation Process

Site prep and grading happen first, smoothing and clearing the ground as much as possible. Then the cushion layer goes down, covering the whole prepared surface. Liner installation and seaming happen on top of that. And finally, there’s an inspection and testing phase to confirm everything’s actually been done right before the dam goes into service.

Why Professional Assessment Matters Before Installation

A real, site-specific risk assessment beats a generic one-size-fits-all approach every single time. Experienced installers actually know how to work out whether a cushion layer’s even needed, and if it is, what type and thickness genuinely suits that particular site.

Getting this decision right from the start saves real money and hassle down the line, avoiding exactly the kind of early failure that costs way more to fix afterward than it would’ve cost to just prevent in the first place.

Final Thoughts 

A protective cushion layer really isn’t some optional extra for most Dam Liners, it’s often the one thing that decides whether a liner performs well for decades or gives out within just a couple of years. Getting the ground prep and cushion layer right protects everything you’ve put into the liner itself.

At GDT Lining, we properly assess every site before recommending a cushion layer approach, so your dam liner actually performs the way it’s meant to, for the long haul. If you’re planning a new lining project, or you’re dealing with a repair, let’s start with a proper look at what your site genuinely needs.

Do You Really Know If Your Business Is Breaking Environmental Law Right Now?

Most business owners don’t think twice about how they store fuel, chemicals, or wastewater on site. Not until an inspector shows up. Or worse, until something actually spills. That’s usually the moment someone finally asks the question, are containment liners actually required by law, or is this just one of those “nice to have” things everyone talks about but nobody enforces?

If your business stores anything that could hurt soil, groundwater, or nearby waterways, this question matters a lot more than most people realise. Containment liners aren’t optional extra in Australia. They’re tied straight into environmental regulations, workplace safety laws, and a bunch of standards that basically every site handling liquids has to follow, whether they know it or not. So let’s actually break this down. What’s required, why it matters, and what happens if you decide to skip it.

What Are Containment Liners and Why Do They Even Exist

Containment liners are basically barriers, usually made from HDPE, PVC, or some other tough synthetic material, and their whole job is to stop liquids from soaking into the ground or making their way into waterways. Picture them as a safety net sitting underneath tanks, ponds, bunds, or storage areas. If something leaks, or a container fails, the liner is what catches it before it turns into a full blown environmental mess.

You’ll find these things used everywhere across Australian industries. Mining sites use them, farms use them, fuel depots rely on them, wastewater treatment plants can’t really function without them, and chemical storage facilities treat them as standard practice. Honestly, wherever there’s a chance of liquid escaping and doing damage, containment liners are probably already in the picture, or they should be.

So, Are Containment Liners Actually Legally Required in Australia?

Here’s the short version, yes, in most cases where you’re dealing with hazardous or polluting liquids. Now here’s the longer version, because it’s never quite that simple, it depends on which state you’re in, what industry you’re operating in, and exactly what you’re storing on site.

Australia doesn’t have one neat little law sitting somewhere that says “every business must install containment liners.” That would honestly make life easier, but it’s not how it works. Instead, the requirements come from a handful of different sources stitched together. Work Health and Safety regulations, for one, actually require workplaces to have a spill containment system ready to go if there’s any risk of a hazardous chemical leaking or spilling. That’s not a friendly suggestion. That’s a legal obligation, and businesses have been fined for ignoring it.

On top of that, each state’s EPA, whether that’s EPA Victoria, EPA NSW, or EPA South Australia, publishes its own set of guidelines around bunding and secondary containment. The fine print shifts a bit depending on which state you’re in, but the core expectation stays pretty much the same everywhere you look. If your site stores liquids that could pollute soil, stormwater, or waterways, you need proper containment liners, or something that does the same job, sitting underneath that risk.

The 110% Rule Every Business Should Actually Know About

Okay, here’s something that catches a lot of people off guard. Just having containment liners isn’t enough on its own, they actually need to hold enough liquid to matter. Most Australian guidelines work off what’s called the 110% rule. Basically, your whole containment setup, liner and all, needs to be able to hold at least 110% of the volume of your largest container on site. Or 25% of everything you’ve got stored, whichever number ends up bigger.

And some states take it even further than that. South Australia, for instance, asks for 120% capacity in certain situations. So if you’ve been assuming your liner just needs to loosely cover the tank and call it a day, that’s not going to fly if an inspector actually runs the numbers on your setup.

Which Australian Standards Actually Apply to Containment Liners

If you’re serious about staying compliant, a handful of standards keep popping up over and over again, no matter who you talk to.

AS1940 covers flammable and combustible liquids, and honestly it’s probably the most referenced standard when people talk about bunding and containment liners. Then there’s AS3780, which deals with corrosive substances, and AS4332, which covers gases in cylinders. Depending on what your business actually handles day to day, one of these, sometimes more than one, is going to shape exactly how your containment system needs to be built.

Nobody’s expecting business owners to have these standards memorised word for word. That’s not realistic. But regulators do expect your containment liners and bunding to actually reflect what these standards call for. In practice, that means the material needs to resist whatever it’s holding, stormwater shouldn’t be able to sneak in and cause an overflow, and the whole system needs to hold up structurally over time, not just look fine on installation day.

What Actually Happens If You Skip Proper Containment Liners

This is where it stops being theoretical for a lot of businesses. Skipping proper containment isn’t just some box you forgot to tick. It comes with real consequences, and they add up fast.

Under Work Health and Safety regulations, businesses have been fined tens of thousands of dollars for not having adequate spill containment in place. And that’s before you even get to the cost of cleaning up an actual spill. There are real cases across Australia where weak bunding and poor containment led to chemicals reaching waterways, and the fallout wasn’t just financial, it hit reputations hard too.

Then there’s the practical side of things. Cleaning contaminated soil or groundwater takes time, money, and usually a team of specialists you didn’t budget for. Put simply, spending on a proper containment liner now is almost always cheaper than dealing with the mess a leak leaves behind later.

Does Every Business Actually Need the Same Type of Containment Liner

Not really, no. What you need comes down to a few things, mainly what liquid you’re storing, how much of it you’ve got, and what specific risks exist at your site.

A site holding large volumes of fuel is obviously going to need something heavier duty and more chemically resistant than a smaller setup dealing with general wastewater. And if your site sits near a waterway or gets hit with heavy rainfall regularly, that changes things too, since stormwater sneaking into a containment area can cause an overflow and basically undo the whole point of having a liner in the first place.

This is exactly why regulators tend to push for a site-specific risk assessment instead of some generic one-size-fits-all solution. It’s not really about ticking a compliance box. It’s about matching your containment liners to the actual risks sitting on your property.

How To Actually Stay On the Right Side of the Regulations

Staying compliant sounds intimidating, but it’s really not that complicated once you know what’s expected of you. Start simple, figure out exactly what liquids you’re storing and how much of each, because that’s what determines which standards even apply to your site.

From there, make sure your containment liners are sized properly using that 110% rule as your baseline. Use materials that can genuinely handle what you’re storing, not just whatever was cheapest at the time. And get into the habit of inspecting things regularly for wear, cracks, or any early signs of damage. Regulators say it again and again, a liner that’s installed once and then forgotten about is almost as risky as having no liner at all.

It’s also worth keeping basic records of your inspections and maintenance work. If a WorkSafe inspector or EPA officer ever turns up at your site, being able to show a documented history of checks makes a huge difference in how seriously they take your compliance efforts.

Final Thoughts

So, back to the original question, are containment liners actually required by environmental regulations in Australia? In most cases involving hazardous or polluting liquids, yes, they are. Sometimes that requirement comes directly from EPA guidelines, other times it’s baked into Work Health and Safety obligations instead. The details shift a bit from state to state, sure, but the core expectation stays consistent no matter where your business operates. If there’s any real risk of a spill reaching soil, stormwater, or waterways, proper containment liners simply aren’t optional anymore.

Getting this right protects your business from fines, protects the environment from real damage, and honestly, it’s just smart business sense at the end of the day. If you’re not completely sure your current setup actually meets the mark, getting a proper site assessment done now is a lot cheaper than finding out the hard way later. That’s exactly where a team like GDT Lining comes in, helping businesses get their containment liners sized, built, and installed properly the first time, so compliance isn’t something you’re scrambling to sort out after an inspector’s already on site.

How Long Do HDPE Liners Last? Factors Affecting Lifespan

When you’re investing in a containment system, one of the first questions that usually comes up is, “How long is it going to last?” After all, whether the liner is being used for water storage, mining operations, wastewater management, or environmental protection, durability plays an important role in determining the overall value of the project. 

That is probably one of the reasons why HDPE Liners is a popular choice. Their resistance to extreme conditions is one of the major contributing factors that enables their wide applicability across various fields of operation. Nonetheless, the life span of each liner varies based on a number of elements that may affect their efficacy over time.

These include the quality of materials used, the quality of installation process, environmental conditions in which they are used, and regularity of maintenance. This knowledge will enable project managers to make the best decisions to ensure maximum performance of their containment system over time.


What Are Synthetic Liners and Why Are They So Durable? 

Before we consider the question of durability of a liner, it is necessary to figure out why the material itself is so popular nowadays.

Understanding HDPE Liners

Synthetic or High-Density Polyethylene is a sturdy material often used for making liners which help ensure that there is no leakage from a project site to its surroundings.

These liners can be found in different fields ranging from mining sites, landfills, wastewater facilities, chemical storage sites, irrigation basins, and even water reservoirs. As their name suggests, their primary function is to act as a lining or liner to make sure that everything inside stays within its boundary.

Liners that are made with the help of this material have the ability to deal with challenging environments without any hassle.

Why These Liners are Used for Long-term Containment


Durability over time is one of the major reasons that lead individuals to choose these liners.

Synthetic Liners are designed in a manner that allows them to resist the effects of all those factors that can deteriorate other liners. Chemical resistance, sunlight resistance, and general damage resistance are a few more benefits offered by protective containment  liners.

Overall, it seems like synthetic Liners are excellent options to opt for due to their durability.

How Long Do the Synthetic Liners Typically Last

This question does not have one correct answer as there are many variables involved in each case. There are various considerations regarding the length of time that a liner will last.

Expected Lifespan of HDPE Liners in Different Applications

Synthetic liners will, when correctly installed and well-maintained, serve reliably for many years, even decades.

Water storage ponds or reservoirs that choose to use protective containment liners, can withstand outdoor environments for a long time while maintaining their operational performance.

This may also apply to mining projects, landfills, and wastewater treatment plants where liners are needed to last through harsh conditions.

Even though every project is unique in its own way, HDPE liners have been used due to the desire for performance.

Factors That Influence The Service Life of HDPE Liners 

A polyethylene liner lifespan is not solely dependent on any single factor. It depends on various aspects that determines how long it will function in the long-run. These factors are: 

  1. Quality of the liner itself 
  2. How long it has been installed 
  3. The weather exposure of the liner 
  4. Nature of the material it stores 

The quality of the liner itself, the installation process of the liner, the weathering process undergone by the liner, and the nature of the substance being stored all play a role here. The quality of the liner becomes irrelevant if it was poorly installed and maintained.

Material Quality and Its Impact on Polyethylene Liners Lifespan 

One of the biggest factors that affect the durability is the quality of the liner itself. 

Importance of High-Quality Polyethylene Liners 

However, not all liner types are equal. Some items are produced from higher-quality materials under strict quality control processes compared to other items.

Using a superior liner will go a long way in the years to come. This is because high-quality materials tend to be more dependable and perform much better even in harsh conditions.

 Polyethylene Liners Thickness and Longevity 

The liner’s thickness can also influence its performance under various conditions.

Thin  Polyethylene Liners and Their Typical Applications 

Where the risk of damaging the liner is minimal and conditions of operation are less harsh, thin liners may be considered.

Thicker  Polyethylene Liners for Demanding Environments 

In case of mining sites, industries, or waste disposal sites, it may be more preferable to have a thicker liner as a result of its extra puncture-resistant characteristics.

Role of Additives in HDPE Liners Performance 

Most HDPE liners have unique additives to increase their longevity.

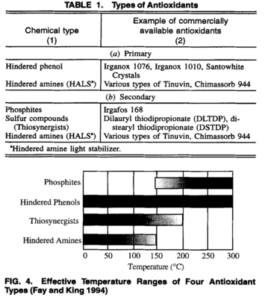
Such additives include UV inhibitors which increase the resistance of the liner to light, as well as have antioxidants that delay the degradation process. One popular example of an additive is carbon black, which increases the environmental resistance of the liner.

How Environmental Conditions Affect HDPE Liners 

Environmental conditions in which the liner will be placed may also significantly affect the lifespan of that liner.

UV Exposure and  Polyethylene Liners Lifespan 

Some containment liners are exposed to outdoor elements such as sun rays almost all the time.

Polyethylene Liners are favored by many because of their superior resistance to UV exposure. Still, exposure to UV rays over time may affect liner performance, so it is critical to choose the appropriate liner specification.

Temperature Extremes and  Polyethylene Liners Performance 

Weather extremes such as heat and cold, as well as constant weather changes, can place stress on materials.

Although Polyethylene Liners are good for use in varied weather, extremely hot or cold temperatures can also be a contributing factor towards the liner’s performance.

Chemical Exposure and  Polyethylene Liners Durability 

The items that are being stored or contained play a significant role in determining how long the liners will last.

Depending on what you have in the storage tank, liners should possess different properties. This is the reason why it is important to select the right liner. With the right liner, its life span can be extended.

The Importance of Proper  Polyethylene Liners Installation 

No matter how good the liners may be, they will never serve their purpose if not properly installed. The proper installation of a liner is a key factor in its success.

How Installation Quality Affects  Polyethylene Liners Lifespan 

An efficiently laid liner will be better able to ensure its longevity.

Problems such as the welding of seams, laying proper groundworks, and the installation itself can greatly reduce any future problems. Considering all these factors initially means that the liner will be well-equipped for future years.

Common Installation Mistakes That Reduce Polyethylene Liners Longevity 

Some of these liner problems may arise from installation errors.

Irregularities in the ground surface, weak welds, and inadvertent puncturing of the liners are just some of the most common problems associated with the installation of liners. These seemingly trivial problems may actually cause serious complications to occur in the future.

Why Professional Installation is Important

It takes both the know-how and experience of professional liners installers to successfully install liners.

Professional installers follow industrial standards and will provide effective liner installations that will increase the lifespan of the liners installed.

Maintenance Practices That Help Extend  Polyethylene Liner Lifespan  

Like many other assets, Polyethylene  Liners also benefit from regular maintenance and monitoring.

Routine Inspection of  Polyethylene Liners 

The more often inspections are made, the more likely minor problems will be detected ahead of time.

In addition, the periodic check-up of the liner will help detect any wear or damage, enabling timely repairs and avoiding contamination.

Preventing Physical Damage to  Polyethylene Liners 

A lot of factors can damage the liner.

By following some simple guidelines, the likelihood of damaging the liner can be avoided or greatly reduced.

Repairing  Polyethylene Liners Before Problems Escalate 

Small tears, holes, and seam issues are usually much easier and more cost-effective to repair if found early.

By doing so, one will ensure that the effectiveness of the containment system is not affected and that small problems do not become bigger ones.

Signs That  Polyethylene Liners May Need Repair or Replacement 

Although very durable, liners will eventually show signs of wear and tear. It is imperative that one is able to notice the signs before anything else takes place.

Visible Surface Damage on  Polyethylene Liners 

The presence of racks, tears, holes, and areas of wear should never be overlooked.

This may suggest that you need to patch up or examine your liner further.

  1. Evidence of Leakage Around  Polyethylene Liners 

Unexpected water level decreases, wet spots near the containment facility, or water leakages may mean that your liner is not doing what it should.

In such cases, you need to act immediately.

Age-Related Wear in  Polyethylene Liners

The importance of inspections increases with age.

This is because, irrespective of whether there are signs of any defects, it is necessary to monitor aging materials for proper performance.

Comparing Polyethylene Liners Lifespan with Other Liner Materials 

There are many project owners who like to compare different liner materials before arriving at a decision. 

Polyethylene Liners vs. PVC Liners

Both materials are used for containment purposes, HDPE is generally known for their strength, durability, and their supreme ability to handle challenging conditions for longer periods.  

Polyethylene Liners vs Other Geomembrane Materials 

Remember that every liner has their own set of strengths and limitations. 

However, the best choice depends on the project, but HDPE remains to be one of the most widely used options because of its balance of durability, reliability and longer service life.

How to Maximise the Lifespan of Synthetic Liners 

Selecting the Right Synthetic Liners for the Application 

Various projects have different needs. 

Choosing a liner that matches the conditions, materials being held, and expected lifespan of the project can make a significant difference for ensuring its long-term performance.

  1. Ensuring Professional Installation of Synthetic Liners 

Proper installation is one of the most important factors that helps in achieving the maximum lifespan. 

In this regard you need to work with experienced installers so that they can help in reducing the possible risks and can also ensure long-term success. 

Implementing a Regular Maintenance Program 

Inspections on a routine basis and proactive maintenance helps the liner remain in good condition. 

This is why preventive maintenance is necessary to prevent the small issues from turning into costly repairs.

Monitoring Environmental and Operational Conditions 

Keeping a check on how the liner is performing over time can provide a sense of valuable information. 

If you notice a change in the operating conditions, or the liner being exposed to the environment, or if you notice a change in the containment performance, then it is likely that repairs are immediately needed.

Why Synthetic  Liners Remain a Long-Term Containment Solution 

Reliability in Industrial Uses 

From mines to wastewater treatment facilities, it has proven its reliability through various sectors.

The reliability of Synthetic liners even when under challenging conditions is another reason why these liners are commonly used.

Environmental Protection Features of Synthetic Liners 

The presence of reliable liners will protect us against any potential leakages and contamination issues.

It will protect our environment from any kind of potential damage.

Saving Costs through Extended Durability of the Product 

By using durable liners, we can be sure that we will not require replacements frequently. We will thus save on costs involved in our projects in the long run.

Frequently Asked Questions 

How long does the life span of HDPE liners last?

It cannot be answered easily since each project is unique. There are a lot of factors that may influence the life expectancy of HDPE liners, such as the material itself, installation, environmental factors, and maintenance among others. Once all these factors are well considered, then the HDPE liners will work well.

Does sunlight affect HDPE liners?

Synthetic liners are able to withstand environmental exposure and are resistant to UV light. This is why HDPE liners are suitable for use in ponds, reservoirs, mines, and other outdoor applications. Environmental exposure can always affect the performance of materials in the long run, but this applies even to synthetic liners.

Can the HDPE liner be repaired if damaged?

Most likely, it can. Minor damage caused by small tears or punctures in the seam area may often be mended to prevent the problem from getting worse.

What is the most important thing that affects the longevity of an HDPE liner?

One cannot say definitely which factors have the greatest role to play in determining the longevity of a liner because there are so many factors affecting the lifespan of a liner. The quality of the liner, its proper installation, environment, and maintenance are the most important among them.

Final Thoughts 

A number of factors determine how long a synthetic liner will last. Among those factors include the quality of the synthetic liner, its installation method, its operating conditions, and regular maintenance and inspection.

Luckily, there is good news about the longevity of synthetic liners. Provided that you select the appropriate synthetic liner and handle it properly, it can serve the purpose for decadesBesides, choosing the right product and properly working with it at the beginning would save you trouble in the future.

For those who plan to utilize liners in their water storage system, mining application, environmental containment, or industrial applications, HDPE Liners is always the best choice. Besides, choosing a reputable manufacturer such as GDT Lining could simplify things for you.

What Thickness of HDPE Liners Should You Choose?

Ever wondered why two projects using the same HDPE liners end up with completely different lifespans? The answer usually comes down to one thing people overlook: thickness. Picking the wrong mil rating for your HDPE liners can mean early tears, leaks, or a total replacement job just a few years in. So how do you actually figure out which thickness fits your site?

Let’s break it down in plain terms so you don’t have to guess.

What Does HDPE Liner Thickness Actually Mean?

The term used by suppliers when referring to HDPE liners is that of thickness measured in either mils or millimeters. 1 mil represents one-thousandth of an inch; thus, a 40 mil liner is thicker and more durable than a 20 mil liner. Some companies provide specifications for their liners based on microns, making it even more confusing for the uninitiated.

The part that many tend to overlook is that thickness is not provided in one constant measurement, but rather in a range due to slight changes in manufacturing tolerance levels during production. In other words, “40 mil” might have slight differences in thickness depending on the specific areas.

Common HDPE Liner Thickness Options

● 20 Mil HDPE Liners

Honestly, this is the thinnest option you’ll come across, and it shows. Fine for a small backyard pond or something you’re only using for a season or two. Just don’t expect it to hold up if there’s a stray rock or root under the surface. It punctures way easier than people think.

● 30 Mil HDPE Liners

A bit tougher, a bit pricier, still not something you’d bet a big project on. Landscapers tend to reach for this one on slightly bigger ponds or water features where they want a little extra confidence without blowing the budget.

● 40 Mil HDPE Liners

This is the one most homeowners and small business owners end up picking, and honestly, it makes sense. It’s thick enough to shrug off everyday wear and tear but doesn’t cost a fortune. If you’re not sure what you need, this is usually a safe starting point.

● 60 Mil HDPE Liners

Now we’re talking real containment work. Think industrial ponds, fish farms, bigger reservoirs, anything that’s under constant pressure or holding a serious volume of liquid. This thickness earns its keep here.

● 80 Mil HDPE Liners

The big one. Landfills, mining sites, large industrial setups, places where a liner failure isn’t just inconvenient, it’s a genuine problem. This is built to last decades, and the price tag reflects that.

Factors That Decide the Right Thickness for HDPE Liners

● Type of Application

A koi pond and a landfill cell are not the same job, so don’t treat them like they are. Figure out what your HDPE liners actually need to do before you start comparing mil ratings. Thicker isn’t automatically the smarter choice.

● Soil and Subgrade Conditions

Ground that’s rocky, uneven, or full of debris will tear through a thin liner faster than you’d expect. If your site isn’t smooth and clean, go thicker. It’s cheap insurance against a bad install.

● Chemical Exposure and Contents Stored

There’s a big difference between storing plain wastewater and storing something chemically aggressive. Certain contents break liners down faster over time, and that alone can push you toward a thicker option even on a small site.

● UV Exposure and Weather Conditions

Sun exposure is brutal on liners left out in the open for years, so you’ll want extra thickness and built-in UV stabilizers in that case. Buried liners dodge the sun problem but still deal with shifting soil and temperature changes underground.

● Expected Lifespan of the Project

Ask yourself how long this actually needs to last. A quick, temporary setup doesn’t need premium 80 mil material. A permanent installation absolutely does. Don’t overpay for durability you’ll never use, and don’t underpay for durability you’ll desperately need.

● Installation Method

Liners left exposed deal with foot traffic, weather, even curious wildlife poking around. Buried liners get some protection from the soil sitting on top of them, but they still need enough thickness to survive the burial process without tearing.

HDPE Liners by Industry: Which Thickness Fits Where

● HDPE Liners for Ponds and Reservoirs

Most home and small commercial ponds are perfectly happy with 30 to 40 mil. Once you’re dealing with a larger reservoir holding serious water volume, bumping up to 60 mil just makes sense for peace of mind.

● HDPE Liners for Landfills

This is one area where you really can’t cut corners. Most regulations call for 60 mil at minimum, and a lot of landfill projects go straight to 80 mil. The risk of containment failure here is just too high to gamble on.


● HDPE Liners for Mining and Industrial Containment

Between harsh chemicals and constant heavy machinery traffic, mining sites chew through weak liners fast. That’s why 60 to 80 mil is basically the standard here. Go thinner and you’re asking for an early failure.

● HDPE Liners for Agriculture and Aquaculture

Fish farms and irrigation setups typically land somewhere around 30 to 45 mil, but it really depends on how much water you’re holding and how long the setup needs to survive.

Thin vs Thick HDPE Liners: What You Gain and What You Give Up

● When Thinner HDPE Liners Make Sense

Cheaper, easier to install, and totally fine for short-term or low-risk jobs. Just don’t ask it to survive rough terrain or years of heavy use, because that’s not what it’s built for.

● When You Need Thicker HDPE Liners

You get better puncture resistance, a longer lifespan, and way more resilience against chemicals or sun exposure. The catch is a higher price tag, and the material can be a bit tougher to work with during installation because it’s stiffer.

Thickness Best For Durability Cost Tier
20 mil Temporary projects Low Budget
30 mil Small ponds Moderate Affordable
40 mil Residential  Commercial Good Mid-range
60 mil Industrial  Aquaculture High Higher
80 mil Landfills / Mining Very High Premium

● How Thickness Affects the Cost of HDPE Liners

Thicker material costs more per square foot, that part’s not exactly a shock. What people forget to factor in is the math down the road. A cheap 20 mil liner that fails in three years and needs a full replacement ends up costing you more than if you’d just gone with a 40 mil liner that lasts fifteen. Think about labor, downtime, and the mess of redoing a site before you let the upfront price make the decision for you.

Compliance and Standards for HDPE Liner Thickness

Some applications just come with legal minimums attached, no way around it. Landfill liners are a good example. They usually fall under environmental regulations that set a minimum thickness, and your budget doesn’t get a say in that. ASTM standards also come into play here, covering how tensile strength, puncture resistance, and seam integrity get tested. Look into your local regulatory requirements before you settle on a thickness, because compliance should be setting your floor, not your wallet.

Common Mistakes When Choosing HDPE Liner Thickness

People assume thicker always means better, but that’s just not true half the time. A mid-range thickness often does the job just fine and saves you money in the process. Some folks skip subgrade prep entirely, which ends up ruining even the toughest liner you could buy. Others skip site-specific testing altogether and just copy whatever thickness worked on a past project, completely ignoring differences in soil, chemical exposure, or climate. And installation stress from welding and seaming gets brushed aside way too often, even though it has a real impact on how the liner performs over the years.

How to Choose the Correct HDPE Liner Thickness for Your Project

Start simple. Ask what the liner needs to hold, how long it needs to last, and what the ground underneath actually looks like. Then check that against any regulatory minimums tied to your project. If chemicals, heavy machinery, or long-term exposure are part of the picture, lean toward the thicker side. And if there’s real financial or environmental risk on the line, don’t just take a blog post’s word for it, talk to a supplier or engineer who can look at your specific site.

FAQs About HDPE Liner Thickness

● What is the standard thickness for HDPE liners?

Most general-purpose projects land somewhere between 30 and 40 mil, though it really depends on what you’re using it for.

● Is 40 mil HDPE liner good enough for a pond?

For most home and small commercial ponds, yeah, it holds up fine. Bigger or deeper reservoirs might need something with more muscle.

● How long do HDPE liners last?

Depending on thickness and site conditions, you’re usually looking at anywhere from 10 to 30 plus years.

● Can HDPE liner thickness be combined through double layering?

It can be. Double layering shows up sometimes in high-risk containment jobs for extra protection, though it does add cost and makes installation a bit more involved.

● What thickness is required for landfill liners?

Most places require at least 60 mil, and a lot of landfill projects go with 80 mil just to be safe.

Final Thoughts

Choosing the right thickness for your HDPE liners really comes down to matching the material to what your site actually needs instead of just guessing. Whatever you need, whether it is just for a small pond in the backyard or something industrial, getting the right thickness is going to save you both time and money later on. Talk to your liner supplier professionals like GDT Lining, about what exactly you are going to need for the job at hand.

Why Subgrade Preparation Matters Before Installing Landfill Liners

Landfill liners have their importance in providing the required containment for wastes while keeping undesirable materials from entering the surrounding environment. Although the liner material may be considered vital in achieving these purposes, the state of the surface below the landfill is equally crucial. For example, a rough surface that may include stones and any other foreign particles may adversely affect the performance of the liner material.

This shows how the preparation of the land before the installation of the liners is crucial since the ground surface may determine the effectiveness of these products. Therefore, adequate effort to ensure that the ground surface is clean and smooth prior to installing Landfill Liners will go a long way in ensuring that they perform effectively.

Why Proper Foundations Are Vital to Landfill Liners

Just like a building requires proper foundations for its successful erection, the same goes for installing landfill liners. In addition to affecting the installation process, the sub-grade conditions are important in terms of the performance of the landfill liners in the long run. Failing to prepare the subgrade properly could cause problems which might be expensive to solve.

a. Subgrade Conditions’ Effect on the Effectiveness of Landfill Liners

It is necessary to ensure that the surface of the ground under the liner is level. Having a properly prepared surface would assist in the proper functioning of the liner because the pressure on it would be spread equally across the ground rather than concentrating in some areas only.

b. Landfill Liners and their Need for Proper Ground Installation Environment

Proper subgrade would allow for a proper installation process. With an even and prepared subgrade surface, it would be possible to install the landfill liner evenly.

c. Reasons Why Quality of Foundation Determines the Longevity of the Liner

The quality of the foundation that exists under the liner determines how the liner will perform. A good foundation ensures that the chance of damaging the liner is reduced and supports the liner.

Common Subgrade Issues That Can Affect Landfill Liners

Prior to putting up a landfill liner, it is necessary for the ground to undergo a thorough evaluation process first. The presence of some concerns that are overlooked at this stage may become an issue in terms of the functionality of the liner.

a. Sharp Objects and Debris Beneath Landfill Liners

Objects like rocks, roots of trees, broken concrete, and other construction debris can be problematic if they remain buried on-site. Such objects can affect the liner when it is being installed or put under pressure after the process is completed. Site cleaning is therefore crucial for the preparation stage.

b. Uneven Surfaces Impacting The Landfill Liners

The area that needs to be covered with the liner should ideally be flat. These imperfections in the surface of the earth will place extra stress on certain areas of the liner.

c. Soft or Unstable Areas Under Landfill Liners

If you notice that certain areas of the ground have poor or strong soil characteristics, there is the possibility that they will move or settle once the installation process is complete. This may affect the liner and will require further maintenance.

d. Drainage Problems That Can Affect The Installation of Landfill Liners

Another key factor to consider is water management. Poor drainage of water could have an effect on the stability of the ground underneath the liner, while it could also cause erosion and settling of soil.

How Subgrade Preparation Supports Long-Term Landfiller Liner Performance

a. Avoiding Pressure on Landfill Liners

Properly prepared surface reduces additional pressure on the landfill liners when installed and while they function.

b. Ensuring Constant Contact Between Landfill Liners and Subgrade

Constant contact between the landfill liners and subgrade increases the reliability of operation by removing potential imperfections.

c. Increasing the Lifespan of Landfill Liner

If the preparation process is conducted appropriately, landfill liners will be ready to work in optimal conditions.

d. Ensuring Minimal Need for Repairs of Landfill Liners in the Future

Taking care of problems at the preparatory stage avoids future repair works.

Key Steps in Preparing Subgrades for Landfill Liners

a. Clearing Site Prior to Installation of Landfill Liners

This step normally entails clearance of any vegetation, debris, and other materials likely to hinder installation.

b. Landfill Liners Grading and Smoothing

Grading provides an opportunity for shaping of desired slopes and drainage and ensuring a smooth installation surface.

c. Compaction for Landfill Liners

Compaction makes soil stable and limits any settling of soils in the future.

d. Subgrade Readiness Checking Before Installation of Landfill Liners

Once the site is ready, a check needs to be made prior to installation to ensure that the project specifications have been met.

Quality Control Measures That Protect Landfill Liners

a. Visual Inspection Before Installation of Landfill Liner Systems

Visual inspections assist in recognizing any evident defects, obstructions, and other surface features that may need rectification.

b. Test Methods Related to the Landfill Liner Systems Project

Tests such as those of compaction tests can be performed to ensure that the created surface meets the set standards.

c. Quality Management for the Landfill Liner Systems Project

Documenting the preparation process is useful for controlling the quality of the project.

The Reasons for Using Quality Control for Liners Projects

Quality control will help reveal defects beforehand and ensure a higher level of consistency in project results.

Advantages of Correctly Preparing Landfill Liners Projects

a. Landfill Liners Supporting Environmental Conservation Goals

A well-installed lining system allows achieving better results concerning containment goals and environmental safety.

b. Reducing Future Risks Concerning the Installation of Landfill Liners

Careful preparations will make it possible to minimize the risk of preventable failures that will necessitate future repairs.

c. Increasing the Performance of Landfill Liners Systems in General

Having stable foundations makes it possible to have a reliable and durable containment system overall.

Typical Pitfalls to Avoid in Landfill Liners Preparations

a. Neglecting Small Defects on the Surface Underneath Landfill Liners

Even small flaws will pose some problems when the liner is installed.

b. Inadequate Inspection Before installing Landfill Liners

Skipping inspections can increase the risk of unresolved site conditions thereby affecting liner performance.

c. Rushing Preparation Activities for Landfill Liners

Taking shortcuts during the preparation can compromise the installation quality and can increase the long-term project risks.

d. Failing to Inspect Before the Installation of Landfill Liners

An inspection helps reveal any issues at an early stage, which results in their seamless performance later in the future.

Frequently Asked Questions

a. Why Subgrades Need To Be Prepared for Landfill Liners?

It helps in ensuring the stability and consistency of the base that enables efficient liner placement and proper functioning.

b. What may be the result of placing liners on an uneven surface?

Placing landfill liners on uneven surfaces could lead to installation problems, among other future problems.

c. How would the density of the subgrade be ensured before lining is installed?

The ground itself is always inspected and tested prior to the installation of any liners. This will ensure that the site satisfies the criteria of the construction.

d. Will there be an effect on the lifespan of the landfill liners if they were put over a poorly-prepared subgrade?

Yes, it might affect the lifespan of the liner because if the ground is not prepared as it should, this might create additional problems.

The Bottom Line

However, site preparation prior to the installation of landfill liners cannot be disregarded. Simple activities like clearing any debris from the site, levelling the area, soil tests, and inspections will play a very important role in ensuring that the liner proves effective.

At GDT Lining, it goes without saying that the significance of site preparation cannot be underestimated in the entire process of installation. The task of installing liners becomes easier if there is a solid foundation underneath.

How to Install HDPE Liner: A Step-by-Step Guide

If you’ve ever dealt with a leaking pond, a seeping canal, or a containment project gone wrong, you already know how expensive the damage can get. More often than not, the liner itself wasn’t the problem — the installation was. That’s the thing about HDPE lining that most people don’t talk about enough: buying good material is only half the job. How you put it down decides whether it lasts 30 years or starts failing in 3.

This guide walks you through the entire installation process — from clearing the ground to covering the HDPE Liner — in a way that actually makes sense on-site.

Before You Begin: Pick the Right Liner Thickness

Not every project needs the same liner. Using something too thin under a landfill is asking for trouble. Going unnecessarily thick on a small farm pond wastes money. Here’s a simple reference:

Application Thickness to Use
Garden or Ornamental Ponds 0.5 mm – 0.75 mm
Farm Ponds and Irrigation Canals 1.0 mm – 1.5 mm
Fish and Shrimp Farming 1.0 mm – 1.5 mm
Industrial or Chemical Containment 1.5 mm – 2.0 mm
Landfills and Mining Sites 1.5 mm – 2.5 mm

What You’ll Need on Site

Equipment:

  • Measuring tape, chalk line, and marking tools
  • Utility knife or a proper geomembrane cutter
  • Hot-wedge welder for main seams
  • Extrusion welder for patches, corners, and pipe connections
  • Vacuum box with compressor for seam testing
  • Air pressure test kit (needle and gauge)
  • Sandbags for holding panels in place during deployment
  • Low-pressure roller or compactor for backfill


Materials:

  • HDPE geomembrane rolls
  • Nonwoven geotextile (150–300 GSM) for cushioning and protection
  • Backfill soil for anchor trenches
  • HDPE repair patches and welding rod

Safety gear: gloves, rubber-soled boots (no sharp soles on the liner, ever), protective eyewear.


Step 1: Plan the Layout Before Anything Else

A lot of installers skip this step or rush through it. Don’t. Fifteen minutes of planning on paper saves hours of wasted material and rework on-site.

Measure the full area you need to cover. Add at least 100–150 mm extra on all edges for overlaps, and another 300 mm specifically for where the liner will fold into the anchor trench around the perimeter. Draw a simple panel layout — which direction rolls will run, where seams will fall, and how many panels you’ll need.

The goal is always to keep seams to a minimum. Think about it: every seam is a joint that has to be welded and tested. The fewer you have, the cleaner and faster the job.

If your project sits under regulations — a lined landfill cell, for example — check what standards apply before you start. GRI GM13 and ASTM D7176 are the ones that usually come up.

Step 2: Prepare the Ground — This Is the Most Important Step

More HDPE liners fail because of poor ground preparation than any other reason. A small rock the size of your thumb, left under the liner, will eventually punch through it under pressure or load. Roots are even worse — they keep growing.

Strip the entire area. Remove rocks, vegetation, roots, debris, anything sharp or angular. Then grade the surface so it’s smooth and compact. A slight slope of 1–2% is good — it stops water from pooling underneath the liner over time, which causes it to shift and bubble.

If your ground is naturally rocky or abrasive — which is common on mining and industrial sites — don’t put the HDPE directly on it. Lay a nonwoven geotextile cushion layer first. It acts as a buffer and stops point loads from damaging the liner from below.

Once the ground is prepared, keep vehicles off it. Even a wheel rut in the compacted surface creates a stress point under the liner.

Step 3: Cut and Label Your Panels

Use a utility knife or geomembrane cutter and make sure edges are clean — rough or ragged edges don’t weld well.

Label every panel clearly. Write it on the liner itself or tag it. When you’re managing 20 or 30 panels on a large site, knowing which panel goes where saves real time and prevents the wrong panel ending up in the wrong spot.

Step 4: Roll Out and Deploy the Liner

Now the liner goes down. This part sounds straightforward but has a few things that catch people out.

Unroll each panel slowly and carefully. Don’t drag or force it — dragging tears it and introduces stretching that weakens the material. If you have a larger project, use a spreader bar and low-pressure equipment to unroll panels without putting people on top of the liner before it’s secured.

Leave some slack — around 5 to 10%. The liner will be pushed down by water weight or backfill, and if it’s stretched tight it’ll tear at the seams or anchors under that load. Slack isn’t sloppiness; it’s intentional.

Use sandbags along the edges to hold panels in place while you work. Wind is the enemy during deployment — panels can shift or billow and undo all your alignment work.

Only deploy what you can weld in one day. HDPE degrades under prolonged UV exposure, and leaving unprotected panels baking in the sun for days before welding shortens their life.

Step 5: Weld the Seams

This is the most skilled part of the job. Bad welding is the number one reason liners leak, and no amount of good material or careful deployment will save you if the seams are wrong.

  • Hot-wedge welding is what you use for all your main, straight seams. A heated copper wedge passes between two overlapping panels and melts both surfaces at once. The rollers pressing from above fuse them together. This method creates a double-track weld with a small air channel running between the two tracks — that channel is what you’ll use for testing later. Panels should overlap by at least 80–100 mm before welding begins.
  • Extrusion welding is for patches, corners, pipe connections (boots), and any repair work. It works like a plastic welding gun — it melts a rod of HDPE and lays a bead of molten material over the seam area. Before extrusion welding, the surface must be ground (roughened) to give the bead something to bond to.

A few rules that matter:

  • Do a trial weld every single morning before production welding starts. Run a short test strip, let it cool, and pull it apart by hand to check the bond. If the weld is right, the material tears before the seam separates.
  • Adjust your temperature and speed settings based on liner thickness. A thicker liner needs more heat and slower travel speed.
  • Stop welding if it rains. Stop welding if there’s heavy fog or high humidity. Moisture in a weld seam creates voids that fail under pressure. Stop welding if the temperature climbs above 50°C — the material can deform before the weld is complete.

Step 6: Test Every Seam Before You Cover Anything

You cannot see a bad weld by looking at it. You have to test it. This step is what separates a liner that performs for 30 years from one that starts seeping in 18 months.

  • Air pressure test— for your hot-wedge double-track seams. Push a needle into the air channel between the two weld tracks and pressurize it to around 25–30 psi. Hold for five minutes. If the pressure holds, the seam is good. If it drops, there’s a void somewhere — find it, mark it, and repair it.
  • Vacuum box test— for extrusion welds and patches. Brush soapy water over the seam. Press the vacuum box flat over the area and pull a vacuum. If bubbles form, air is passing through — meaning the weld isn’t sealed. Repair and retest.
  • Destructive testing— for large projects, you also pull physical samples from the liner approximately every 150 linear feet of weld. These get tested in a tensiometer for peel and shear strength against ASTM D6392 standards. The numbers have to hit a minimum threshold before that section is signed off.

Any seam that fails gets repaired — grind the area, weld a patch over it that extends at least 150 mm in every direction, and test it again. Keep going until everything passes.

Step 7: Anchor the Liner Around the Perimeter

All that careful installation work can be undone if the liner isn’t anchored properly at the edges. Wind can lift unsecured panels. Water pressure can push the liner inward. On slopes, gravity works against you.

Dig a trench around the perimeter of the lined area — typically 300–450 mm deep and 300 mm wide, though larger projects may need bigger trenches depending on soil and expected loads. Fold the liner edge into the trench, then backfill with compacted soil in layers. Pack it properly; loose backfill will let the liner pull out over time.

On slopes, textured HDPE liner (which has a roughened surface on one or both sides) is worth using. The texture increases friction against the soil above and below, which prevents the liner from sliding under load.

If your project has pipes, inlets, or monitoring wells passing through the liner, each one needs a prefabricated boot — a shaped HDPE fitting that gets extrusion-welded around the penetration point. Each boot gets individually pressure-tested. Penetrations are statistically the most common failure point on any liner system, so take them seriously.

Step 8: Cover and Protect

Get a protection layer down as soon as the welding, testing, and anchoring are done. Don’t leave the HDPE exposed any longer than necessary.

Lay a nonwoven geotextile directly on top of the liner before any soil, gravel, or drainage material goes on. This protects the liner surface from abrasion and point loads during covering.

For landfill cells, the protection layer is followed by the leachate collection layer — typically a gravel drainage blanket with perforated collection pipes sitting on top of the liner.

For ponds, start filling with water slowly from the deepest point. The weight of the water naturally presses the liner into the contours of the excavation and takes up any remaining slack. Don’t rush the filling — give it time to settle. After 24–48 hours, trim any excess liner at the edges and complete the anchor trench backfill.

For everything else — canals, containment bunds, caps — use low-pressure vehicles to place the cover soil. No heavy machinery directly on the liner.


Step 9: Document Everything

This matters a lot on regulated projects, but honestly, it’s a smart move no matter what kind of liner job you’re doing.Track every panel. Write down which roll you used, exactly where you put it, and the date you installed it. Log your welding parameters each day: temperature settings, speed, operator name, weather conditions. Record every seam test and its result. Note every repair — what failed, where, what was done, and whether it passed on retest. Keep the material certifications from the manufacturer.

If the project ever needs an inspection or if a problem develops years down the line, this documentation tells you exactly what happened and when. It protects you and it protects the client.

The Mistakes That Actually Cause Liner Failures

Most liner problems trace back to the same handful of errors. Worth knowing them so you don’t repeat them:

  • Skipping subgrade preparation or doing it halfway. The ground looks smooth enough — until a rock you didn’t find punctures the liner six months later under the weight of a full pond.
  • Welding in wet or humid conditions. A seam that looks fine visually can have moisture voids inside that only show up under pressure testing — or worse, after the liner is covered and in service.
  • Not leaving enough slack. A liner pulled tight across the surface will crack or tear at connection points as soon as any load or settlement comes.
  • Covering the liner without testing the seams first. Once backfill is on, a failed seam is almost impossible to find and extremely expensive to repair.
  • Leaving the liner exposed too long between installation and covering. HDPE is UV-resistant, but it’s not UV-proof. Extended exposure degrades the surface over months, which affects long-term performance.

Common Questions People Ask

a. Can I install the HDPE liner without professional help?

For a small single-panel pond — yes, if you’re careful and the liner doesn’t need welding. As soon as you’re joining panels or working on anything commercial, industrial, or regulated, you need a certified installer. The welding equipment alone requires skill to operate correctly, and improper seams aren’t something you discover until there’s already a problem.

b. How long will the liner last if installed properly?

A well-installed HDPE liner, with proper protection above and below, will realistically last 30 to 50 years. The main things that shorten lifespan are UV exposure from not covering it, physical damage from improper covering, and chemical exposure outside the liner’s rated range.

c. What do I do if the liner gets punctured after installation?

Clean the damaged area, grind the surface lightly around the puncture, and extrusion-weld an HDPE patch over it. The patch should extend at least 150 mm beyond the damaged area on all sides. Test the patch with a vacuum box before covering.

d. Does HDPE liner work in extremely hot or cold climates?

Yes. HDPE handles a wide temperature range and is one of the most climate-adaptable liner materials available. In very cold conditions, the liner becomes slightly stiffer, so handling needs to be more careful during deployment. In extreme heat, welding parameters need adjustment to account for the surface temperature of the material.

e. What’s the difference between smooth and textured HDPE liners?

Smooth HDPE is used on flat and gently sloping applications. Textured HDPE — which has a rough surface on one or both sides — is used on slopes where you need friction between the liner and the soil layers above or below it. Slopes steeper than about 3:1 generally need textured liner to stay stable.

The Bottom Line

Most people think HDPE liner problems come from bad material. In our experience at GDT Lining, that’s rarely true. The material almost never fails — the installation does. A rock left in the ground, a seam welded in the wrong conditions, a pressure test skipped because the day ran long. That’s what causes a perfectly good liner to leak.

The good news is that none of this is hard to get right when you know what you’re doing. Clear the ground properly, weld with the right equipment and the right conditions, test every seam before it gets covered — and that liner will still be doing its job when most other site infrastructure has been replaced twice over.

That’s the standard GDT Lining holds itself to on every project we take on. Not because the paperwork demands it, but because we’ve seen what happens when someone cuts corners on a containment job — and it’s never a small problem.

If you’re planning an HDPE lining project and want it done in a way you won’t be revisiting in two years, talk to us. GDT Lining works across ponds, canals, landfills, and industrial containment — and we’d rather answer your questions at the planning stage than help you fix something that went wrong during installation.

How Long Do HDPE Liners Last? Factors Affecting Lifespan

When you’re investing in a containment system, one of the first questions that usually comes up is, “How long is it going to last?” After all, whether the liner is being used for water storage, mining operations, wastewater management, or environmental protection, durability plays an important role in determining the overall value of the project.

That is probably one of the reasons why HDPE Liners is a popular choice. Their resistance to extreme conditions is one of the major contributing factors that enables their wide applicability across various fields of operation. Nonetheless, the life span of each liner varies based on a number of elements that may affect their efficacy over time. These include the quality of materials used, the quality of installation process, environmental conditions in which they are used, and regularity of maintenance. This knowledge will enable project managers to make the best decisions to ensure maximum performance of their containment system over time.

What Are Synthetic Liners and Why Are They So Durable?

Before we consider the question of durability of a liner, it is necessary to figure out why the material itself is so popular nowadays.

Understanding HDPE Liners

Synthetic or High-Density Polyethylene is a sturdy material often used for making liners which help ensure that there is no leakage from a project site to its surroundings.

These liners can be found in different fields ranging from mining sites, landfills, wastewater facilities, chemical storage sites, irrigation basins, and even water reservoirs. As their name suggests, their primary function is to act as a lining or liner to make sure that everything inside stays within its boundary.

Liners that are made with the help of this material have the ability to deal with challenging environments without any hassle.

Why These Liners are Used for Long-term Containment

Durability over time is one of the major reasons that lead individuals to choose these liners.

Synthetic Liners are designed in a manner that allows them to resist the effects of all those factors that can deteriorate other liners. Chemical resistance, sunlight resistance, and general damage resistance are a few more benefits offered by protective containment  liners.

Overall, it seems like synthetic Liners are excellent options to opt for due to their durability.

How Long Do the Synthetic Liners Typically Last

This question does not have one correct answer as there are many variables involved in each case. There are various considerations regarding the length of time that a liner will last.

Expected Lifespan of HDPE Liners in Different Applications

Synthetic liners will, when correctly installed and well-maintained, serve reliably for many years, even decades.

Water storage ponds or reservoirs that choose to use protective containment liners, can withstand outdoor environments for a long time while maintaining their operational performance.

This may also apply to mining projects, landfills, and wastewater treatment plants where liners are needed to last through harsh conditions.

Even though every project is unique in its own way, HDPE liners have been used due to the desire for performance.

Factors That Influence The Service Life of HDPE Liners

A polyethylene liner lifespan is not solely dependent on any single factor. It depends on various aspects that determines how long it will function in the long-run. These factors are:

  1. Quality of the liner itself
  2. How long it has been installed
  3. The weather exposure of the liner
  4. Nature of the material it stores

The quality of the liner itself, the installation process of the liner, the weathering process undergone by the liner, and the nature of the substance being stored all play a role here. The quality of the liner becomes irrelevant if it was poorly installed and maintained.

Material Quality and Its Impact on Polyethylene Liners Lifespan

One of the biggest factors that affect the durability is the quality of the liner itself.

Importance of High-Quality Polyethylene Liners

However, not all liner types are equal. Some items are produced from higher-quality materials under strict quality control processes compared to other items.

Using a superior liner will go a long way in the years to come. This is because high-quality materials tend to be more dependable and perform much better even in harsh conditions.

a.  Polyethylene Liners Thickness and Longevity

The liner’s thickness can also influence its performance under various conditions.

b. Thin  Polyethylene Liners and Their Typical Applications

Where the risk of damaging the liner is minimal and conditions of operation are less harsh, thin liners may be considered.

c. Thicker  Polyethylene Liners for Demanding Environments

In case of mining sites, industries, or waste disposal sites, it may be more preferable to have a thicker liner as a result of its extra puncture-resistant characteristics.

d. Role of Additives in HDPE Liners Performance

Most HDPE liners have unique additives to increase their longevity.

Such additives include UV inhibitors which increase the resistance of the liner to light, as well as have antioxidants that delay the degradation process. One popular example of an additive is carbon black, which increases the environmental resistance of the liner.

How Environmental Conditions Affect HDPE Liners

Environmental conditions in which the liner will be placed may also significantly affect the lifespan of that liner.

a. UV Exposure and  Polyethylene Liners Lifespan

Some containment liners are exposed to outdoor elements such as sun rays almost all the time.

Polyethylene Liners are favored by many because of their superior resistance to UV exposure. Still, exposure to UV rays over time may affect liner performance, so it is critical to choose the appropriate liner specification.

b. Temperature Extremes and  Polyethylene Liners Performance

Weather extremes such as heat and cold, as well as constant weather changes, can place stress on materials.

Although Polyethylene Liners are good for use in varied weather, extremely hot or cold temperatures can also be a contributing factor towards the liner’s performance.

c. Chemical Exposure and  Polyethylene Liners Durability

The items that are being stored or contained play a significant role in determining how long the liners will last.

Depending on what you have in the storage tank, liners should possess different properties. This is the reason why it is important to select the right liner. With the right liner, its life span can be extended.

The Importance of Proper  Polyethylene Liners Installation

No matter how good the liners may be, they will never serve their purpose if not properly installed. The proper installation of a liner is a key factor in its success.

How Installation Quality Affects  Polyethylene Liners Lifespan

An efficiently laid liner will be better able to ensure its longevity.

Problems such as the welding of seams, laying proper groundworks, and the installation itself can greatly reduce any future problems. Considering all these factors initially means that the liner will be well-equipped for future years.

Common Installation Mistakes That Reduce Polyethylene Liners Longevity

Some of these liner problems may arise from installation errors.

Irregularities in the ground surface, weak welds, and inadvertent puncturing of the liners are just some of the most common problems associated with the installation of liners. These seemingly trivial problems may actually cause serious complications to occur in the future.

Why Professional Installation is Important

It takes both the know-how and experience of professional liners installers to successfully install liners.

Professional installers follow industrial standards and will provide effective liner installations that will increase the lifespan of the liners installed.

Maintenance Practices That Help Extend  Polyethylene Liner Lifespan  

Like many other assets, Polyethylene  Liners also benefit from regular maintenance and monitoring.

a. Routine Inspection of  Polyethylene Liners

The more often inspections are made, the more likely minor problems will be detected ahead of time.

In addition, the periodic check-up of the liner will help detect any wear or damage, enabling timely repairs and avoiding contamination.

b. Preventing Physical Damage to  Polyethylene Liners

A lot of factors can damage the liner.

By following some simple guidelines, the likelihood of damaging the liner can be avoided or greatly reduced.

c. Repairing  Polyethylene Liners Before Problems Escalate

Small tears, holes, and seam issues are usually much easier and more cost-effective to repair if found early.

By doing so, one will ensure that the effectiveness of the containment system is not affected and that small problems do not become bigger ones.

Signs That  Polyethylene Liners May Need Repair or Replacement

Although very durable, liners will eventually show signs of wear and tear. It is imperative that one is able to notice the signs before anything else takes place.

a. Visible Surface Damage on  Polyethylene Liners

The presence of racks, tears, holes, and areas of wear should never be overlooked.

This may suggest that you need to patch up or examine your liner further.

b. Evidence of Leakage Around  Polyethylene Liners

Unexpected water level decreases, wet spots near the containment facility, or water leakages may mean that your liner is not doing what it should.

In such cases, you need to act immediately.

c. Age-Related Wear in  Polyethylene Liners

The importance of inspections increases with age.

This is because, irrespective of whether there are signs of any defects, it is necessary to monitor aging materials for proper performance.

Comparing Polyethylene Liners Lifespan with Other Liner Materials

There are many project owners who like to compare different liner materials before arriving at a decision.

a.  Polyethylene Liners vs. PVC Liners

Both materials are used for containment purposes, HDPE is generally known for their strength, durability, and their supreme ability to handle challenging conditions for longer periods.  

b.  Polyethylene Liners vs Other Geomembrane Materials

Remember that every liner has their own set of strengths and limitations.

However, the best choice depends on the project, but HDPE remains to be one of the most widely used options because of its balance of durability, reliability and longer service life.

How to Maximise the Lifespan of Synthetic Liners

a. Selecting the Right Synthetic Liners for the Application

Various projects have different needs.

Choosing a liner that matches the conditions, materials being held, and expected lifespan of the project can make a significant difference for ensuring its long-term performance.

b. Ensuring Professional Installation of Synthetic Liners

Proper installation is one of the most important factors that helps in achieving the maximum lifespan.

In this regard you need to work with experienced installers so that they can help in reducing the possible risks and can also ensure long-term success.

c. Implementing a Regular Maintenance Program

Inspections on a routine basis and proactive maintenance helps the liner remain in good condition.

This is why preventive maintenance is necessary to prevent the small issues from turning into costly repairs.

d. Monitoring Environmental and Operational Conditions

Keeping a check on how the liner is performing over time can provide a sense of valuable information.

If you notice a change in the operating conditions, or the liner being exposed to the environment, or if you notice a change in the containment performance, then it is likely that repairs are immediately needed.

Why Synthetic  Liners Remain a Long-Term Containment Solution

a. Reliability in Industrial Uses

From mines to wastewater treatment facilities, it has proven its reliability through various sectors.

The reliability of Synthetic liners even when under challenging conditions is another reason why these liners are commonly used.

b. Environmental Protection Features of Synthetic Liners

The presence of reliable liners will protect us against any potential leakages and contamination issues.

It will protect our environment from any kind of potential damage.

c. Saving Costs through Extended Durability of the Product

By using durable liners, we can be sure that we will not require replacements frequently.

We will thus save on costs involved in our projects in the long run.

Frequently Asked Questions

a. How long does the life span of HDPE liners last?

It cannot be answered easily since each project is unique. There are a lot of factors that may influence the life expectancy of HDPE liners, such as the material itself, installation, environmental factors, and maintenance among others. Once all these factors are well considered, then the HDPE liners will work well.

b. Does sunlight affect HDPE liners?

Synthetic liners are able to withstand environmental exposure and are resistant to UV light. This is why HDPE liners are suitable for use in ponds, reservoirs, mines, and other outdoor applications. Environmental exposure can always affect the performance of materials in the long run, but this applies even to synthetic liners.

c. Can the HDPE liner be repaired if damaged?

Most likely, it can. Minor damage caused by small tears or punctures in the seam area may often be mended to prevent the problem from getting worse.

d. What is the most important thing that affects the longevity of an HDPE liner?

One cannot say definitely which factors have the greatest role to play in determining the longevity of a liner because there are so many factors affecting the lifespan of a liner. The quality of the liner, its proper installation, environment, and maintenance are the most important among them.

Final Thoughts

A number of factors determine how long a synthetic liner will last. Among those factors include the quality of the synthetic liner, its installation method, its operating conditions, and regular maintenance and inspection.

Luckily, there is good news about the longevity of synthetic liners. Provided that you select the appropriate synthetic liner and handle it properly, it can serve the purpose for decades Besides, choosing the right product and properly working with it at the beginning would save you trouble in the future.

For those who plan to utilize liners in their water storage system, mining application, environmental containment, or industrial applications, HDPE Liners is always the best choice. Besides, choosing a reputable manufacturer such as GDT Lining could simplify things for you.

Why Subgrade Preparation Matters Before Installing Landfill Liners

Landfill liners have their importance in providing the required containment for wastes while keeping undesirable materials from entering the surrounding environment. Although the liner material may be considered vital in achieving these purposes, the state of the surface below the landfill is equally crucial. For example, a rough surface that may include stones and any other foreign particles may adversely affect the performance of the liner material.

This shows how the preparation of the land before the installation of the liners is crucial since the ground surface may determine the effectiveness of these products. Therefore, adequate effort to ensure that the ground surface is clean and smooth prior to installing Landfill Liners will go a long way in ensuring that they perform effectively.

Why Proper Foundations Are Vital to Landfill Liners

Just like a building requires proper foundations for its successful erection, the same goes for installing landfill liners. In addition to affecting the installation process, the sub-grade conditions are important in terms of the performance of the landfill liners in the long run. Failing to prepare the subgrade properly could cause problems which might be expensive to solve.

  • Subgrade Conditions’ Effect on the Effectiveness of Landfill Liners

It is necessary to ensure that the surface of the ground under the liner is level. Having a properly prepared surface would assist in the proper functioning of the liner because the pressure on it would be spread equally across the ground rather than concentrating in some areas only.

  • Landfill Liners and their Need for Proper Ground Installation Environment

Proper subgrade would allow for a proper installation process. With an even and prepared subgrade surface, it would be possible to install the landfill liner evenly.

  • Reasons Why Quality of Foundation Determines the Longevity of the Liner

The quality of the foundation that exists under the liner determines how the liner will perform. A good foundation ensures that the chance of damaging the liner is reduced and supports the liner.

Common Subgrade Issues That Can Affect Landfill Liners

Prior to putting up a landfill liner, it is necessary for the ground to undergo a thorough evaluation process first. The presence of some concerns that are overlooked at this stage may become an issue in terms of the functionality of the liner.

  • Sharp Objects and Debris Beneath Landfill Liners

Objects like rocks, roots of trees, broken concrete, and other construction debris can be problematic if they remain buried on-site. Such objects can affect the liner when it is being installed or put under pressure after the process is completed. Site cleaning is therefore crucial for the preparation stage.

  • Uneven Surfaces Impacting The Landfill Liners

The area that needs to be covered with the liner should ideally be flat. These imperfections in the surface of the earth will place extra stress on certain areas of the liner.

  • Soft or Unstable Areas Under Landfill Liners

If you notice that certain areas of the ground have poor or strong soil characteristics, there is the possibility that they will move or settle once the installation process is complete. This may affect the liner and will require further maintenance.

  • Drainage Problems That Can Affect The Installation of Landfill Liners

Another key factor to consider is water management. Poor drainage of water could have an effect on the stability of the ground underneath the liner, while it could also cause erosion and settling of soil.

How Subgrade Preparation Supports Long-Term Landfiller Liner Performance

  • Avoiding Pressure on Landfill Liners

Properly prepared surface reduces additional pressure on the landfill liners when installed and while they function.

  • Ensuring Constant Contact Between Landfill Liners and Subgrade


Constant contact between the landfill liners and subgrade increases the reliability of operation by removing potential imperfections.

  • Increasing the Lifespan of Landfill Liner

If the preparation process is conducted appropriately, landfill liners will be ready to work in optimal conditions.

  • Ensuring Minimal Need for Repairs of Landfill Liners in the Futurec

Taking care of problems at the preparatory stage avoids future repair works.

Key Steps in Preparing Subgrades for Landfill Liners

  • Clearing Site Prior to Installation of Landfill Liners

This step normally entails clearance of any vegetation, debris, and other materials likely to hinder installation.

  • Landfill Liners Grading and Smoothing

Grading provides an opportunity for shaping of desired slopes and drainage and ensuring a smooth installation surface.

  • Compaction for Landfill Liners

Compaction makes soil stable and limits any settling of soils in the future.

  • Subgrade Readiness Checking Before Installation of Landfill Liners

Once the site is ready, a check needs to be made prior to installation to ensure that the project specifications have been met.

Quality Control Measures That Protect Landfill Liners

  • Visual Inspection Before Installation of Landfill Liner Systems

Visual inspections assist in recognizing any evident defects, obstructions, and other surface features that may need rectification.

  • Test Methods Related to the Landfill Liner Systems Project

Tests such as those of compaction tests can be performed to ensure that the created surface meets the set standards.

  • Quality Management for the Landfill Liner Systems Project

Documenting the preparation process is useful for controlling the quality of the project.

The Reasons for Using Quality Control for Liners Projects

Quality control will help reveal defects beforehand and ensure a higher level of consistency in project results.

Advantages of Correctly Preparing Landfill Liners Projects

  • Landfill Liners Supporting Environmental Conservation Goals

A well-installed lining system allows achieving better results concerning containment goals and environmental safety.

  • Reducing Future Risks Concerning the Installation of Landfill Liners

Careful preparations will make it possible to minimize the risk of preventable failures that will necessitate future repairs.

  • Increasing the Performance of Landfill Liners Systems in General

Having stable foundations makes it possible to have a reliable and durable containment system overall.

Typical Pitfalls to Avoid in Landfill Liners Preparations

  • Neglecting Small Defects on the Surface Underneath Landfill Liners

Even small flaws will pose some problems when the liner is installed.

  • Inadequate Inspection Before installing Landfill Liners

Skipping inspections can increase the risk of unresolved site conditions thereby affecting liner performance.

  • Rushing Preparation Activities for Landfill Liners

Taking shortcuts during the preparation can compromise the installation quality and can increase the long-term project risks.

  • Failing to Inspect Before the Installation of Landfill Liners

An inspection helps reveal any issues at an early stage, which results in their seamless performance later in the future.

Frequently Asked Questions

a. Why Subgrades Need To Be Prepared for Landfill Liners?

It helps in ensuring the stability and consistency of the base that enables efficient liner placement and proper functioning.

b. What may be the result of placing liners on an uneven surface?

Placing landfill liners on uneven surfaces could lead to installation problems, among other future problems.

c. How would the density of the subgrade be ensured before lining is installed?

The ground itself is always inspected and tested prior to the installation of any liners. This will ensure that the site satisfies the criteria of the construction.

d. Will there be an effect on the lifespan of the landfill liners if they were put over a poorly-prepared subgrade?

Yes, it might affect the lifespan of the liner because if the ground is not prepared as it should, this might create additional problems.

The Bottom Line

However, site preparation prior to the installation of landfill liners cannot be disregarded. Simple activities like clearing any debris from the site, levelling the area, soil tests, and inspections will play a very important role in ensuring that the liner proves effective.

At GDT Lining, it goes without saying that the significance of site preparation cannot be underestimated in the entire process of installation. The task of installing liners becomes easier if there is a solid foundation underneath.

HDPE vs PVC Dam Liners: Key Differences Explained

Pick the wrong dam liner and you could be replacing it in five years — or dealing with leaks that cost far more than the liner itself. That is a situation most projects cannot afford.

HDPE and PVC dam liners are the two most widely used options on the market. They look similar on the surface but differ significantly in durability, installation, cost, and safety. This guide breaks down exactly what sets them apart so you can make the right call for your project.

Why the Choice of Dam Liner Actually Matters

A dam liner is not something you want to revisit every few years. Whether you are storing water for a farm, managing runoff on a mine site, or lining a fish pond, the liner is what keeps everything contained. Get it right and it works quietly for decades. Get it wrong and you are dealing with leaks, contamination, or a full replacement far sooner than planned.

The material you choose directly affects how long it lasts, how safe the water is, and how much the whole project costs over time.

What Are HDPE and PVC Dam Liners?

Both are synthetic liners used to seal dams, ponds, and reservoirs against water loss. Beyond that, they are quite different materials.

HDPE Dam Liners

HDPE is a hard and strong material. It does not bend or break easily, which is exactly what you want when it is sitting under water for years. You can get it in different thicknesses — anywhere from 0.5mm to 2mm — depending on how heavy duty your project is. The good thing about HDPE is that it does not get damaged by chemicals or any exposure to sunlight. It just keeps doing its job. Another big plus is that it does not mix anything into the water, so it is completely safe if you are storing drinking water or raising fish. And it lasts a long time — we are talking 20 to 50 years if it is looked after properly.

PVC Dam Liners

PVC is the lighter, more flexible option of the two. It is much easier to carry around on site and you can shape it around awkward edges or odd-shaped dams without a lot of hassle. As compared to HDPE it costs less that makes it a decent option if you are working with a tighter budget. In decent conditions it can last anywhere from 10 to 20 years, though that number drops if it is constantly exposed to harsh weather or strong sunlight. One thing worth knowing is that PVC has certain additives in it that can slowly seep into the water over time. That is why it is not a good idea to use it if you are storing drinking water or running a fish farm — for those situations you really need something safer.

How HDPE and PVC Dam Liners Are Different

  • Durability and Lifespan

If your site gets a lot of sun, deals with chemicals, or goes through extreme hot and cold weather, HDPE is going to hold up much better. It can last two to three times longer than PVC in those kinds of conditions. For something like a mining site or a large farm reservoir, that difference is huge — you do not want to be pulling up a liner and replacing it every few years.

  • Installation

HDPE needs to be welded by a professional to make sure the seams are properly sealed. It is not something you can do yourself with basic tools. PVC is a lot more straightforward. It is light, it bends easily, and you can cut it and fit it on site without needing to bring in specialist contractors. For smaller projects that is a big advantage.

  • Cost

PVC is cheaper to buy and cheaper to install — there is no getting around that. But HDPE lasts so much longer that over the full life of a project it often works out to be the better deal. If you are putting in a permanent structure that needs to last decades, paying more upfront for HDPE usually saves you money in the long run. PVC makes more sense when the project is smaller or you know it is not going to be a permanent setup.

Which Applications Suit Each Material?

If you are working on something big or serious — a mining site, a large farm reservoir, a drinking water tank, or a commercial fish farm — HDPE is really the only material that makes sense. These are situations where the water quality matters, the conditions are tough, and you cannot afford for the liner to fail. HDPE handles all of that without any issues.

PVC is better suited to smaller, lower-pressure projects. Think garden ponds, decorative water features, small irrigation dams, or anything that is temporary. If the project is not going to face harsh conditions and you are watching your budget, PVC does the job well enough without spending more than you need to.

Frequently Asked Questions

  1. Which one actually lasts longer — HDPE or PVC?HDPE lasts a lot longer, honestly. If it is looked after properly you are looking at anywhere between 20 to 50 years. PVC is more like 10 to 20 years, and that is in decent conditions. If it is getting hit by strong sunlight or dealing with temperature swings regularly, it will not even make it that long.
  2. Can I use PVC for my fish pond?We would not recommend it. PVC has certain additives in it that slowly seep into the water over time and that is not good for fish at all. If you are setting up a fish pond or any kind of aquaculture setup, go with HDPE. It does not release anything into the water so your fish are completely safe.
  3. If my liner gets damaged, which one is easier to fix?PVC is much easier to deal with. Most of the time you can sort it out yourself with a basic adhesive patch kit — no specialist needed. HDPE is a different story. You need proper welding equipment and someone who knows how to use it to get a reliable fix. It is not a quick on-site job.Still Not Able to Choose the Perfect Dam Liners? Speak with the Experts Now

    Look, both materials work. It really just depends on what you are trying to do. If you are building something permanent, storing drinking water, or working in tough conditions, HDPE is the one to go with. If it is a smaller project and budget is the main concern, PVC works perfectly well. The mistake most people make is choosing based on price alone without thinking about how long they need it to last or what the water is actually being used for.

    Before you buy anything, it is worth having a proper conversation with someone who knows their stuff. GDT Lining has been helping people find the right HDPE vs PVC dam liners for all kinds of projects — big and small. Get in touch with them before you commit and you will save yourself a lot of time, money, and headaches down the line.

DAM Liners for Heavy Industry in Australia: Advancing Environmental Sustainability

The heavy industry sector in Australia, such as mining, oil and gas, and agriculture, has a significant impact on the environment. One of the most significant challenges in these industries is managing the storage and containment of liquids and materials, such as chemicals and waste products. The use of digital asset modeling language (DAM) liners is an innovative solution that can enhance environmental sustainability by improving the storage and containment of hazardous materials.

DAM liners are high-quality, flexible barriers used to contain liquids and materials in heavy industries. They are made of various materials, including reinforced polyethylene, PVC, and geotextiles, which are resistant to chemical exposure, punctures, and tears. DAM liners are ideal for lining ponds, lagoons, and other containment areas in heavy industries, providing a safe and secure solution for storing hazardous materials.

In the mining industry, DAM liners can be used to line tailings dams, leach pads, and other containment areas. This helps to prevent the release of hazardous materials into the environment, protecting the ecosystem and wildlife. DAM liners can also reduce water usage by preventing water loss through seepage, thereby conserving this precious resource.

In the agriculture industry, DAM liners can be used to line irrigation channels, ponds, and reservoirs, helping to prevent contamination of the water supply. This helps to protect the health of humans and animals, as well as the surrounding environment.

DAM liners are also widely used in the oil and gas industry to line storage tanks, pits, and containment areas. This helps to prevent spills and leaks, protecting the environment and reducing the risk of fines and legal action.

In conclusion, DAM liners are a vital solution for heavy industries in Australia, advancing environmental sustainability by providing a safe and secure way to store hazardous materials. By incorporating DAM liners into their operations, heavy industries can help to protect the environment, reduce water usage, and maintain regulatory compliance, contributing to a better future for all.

Geomembrane Composition and Antioxidants – Dam Liners

The HDPE geomembrane contains antioxidant packages to protect the liner from oxidation during the production of the membrane and during the field life of the membrane. HDPE formulation consists of weight percentages 96-97.5% polyethylene (PE) Resin, 2-3% carbon black and up to 0.5% antioxidants. Carbon black is added to the geomembrane to limit potential damage by UV radiation. The amount of carbon black added is generally less than 3%. Amounts greater than that required to reduce opacity are wasted. The specific antioxidant package used in the HDPE formulation is dependent on the manufacturer of the HDPE. Antioxidants that are most widely used are indicated in Figure 8 Antioxidant Types (Koerner, 1998). Antioxidants are divided into two types; Primary, which limits oxidation during the geomembrane manufacturing process, and Secondary, which provide long-term protection during the service life of the material.

The chemical ageing of a geomembrane follows three stages:

  1. A period where the antioxidant is depleted.
  2. An induction period where the polymer degrades following the depletion of the antioxidant.
  3. Time to reach 50% degradation of a particular property (Half-Life)

The depletion of antioxidants is the result of the intrusion of oxygen into the structure of the geomembrane.

The rate of depletion of antioxidants is a function of among other things; the service temperature of the geomembrane and the presence of oxidizing liquid on one or both surfaces of the geomembrane. The rate of extraction of the antioxidant is controlled by the dissolution of the antioxidants at the surface of the geomembrane and the rate of diffusion from the interior to the surface of the geomembrane. It has been found that the consumption of antioxidants is three times faster in water than air (Smith, 1992).

Testing has been developed to measure the level of remaining antioxidants in a sample of geomembrane and thus provide an indication of the remaining service life of the HDPE. Two tests are:

OIT (Oxidative Induction Time). Samples are heated up under a nitrogen atmosphere, typically to 200C. Oxygen is then introduced to the sample cell, and the length of time before the onset of degradation, as seen by the initiation of an exothermic process in the DSC trace is measured

HPOIT (High Pressure Oxidative Induction Time). Similar to OIT testing but is carried out at lower temperature, 150C and higher pressure. The procedure was developed because heating to 200C can cause the decay of some types of antioxidants (HALS or Hindered Amine Light Stabilisers)and provide a false (low) indication of the level of antioxidant remaining in the formulation.

What Kind of Dam Liners We Should Use for a Pond

We are often asked what kind of liner we should use for a pond. The answer is not simple. There are many variables:

  • What is being stored? What is the PH of the liquid being stored? This will determine the type of polymer that is to be used if indeed a polymer is suitable at all. Liner manufacturers produce chemical resistance charts – these should be consulted.
  • Once the chemical compatibility is determined then we can decide what thickness of the liner is to be used. The thickness will be determined by the condition of the subgrade (How many rocks and what size and shape) and what life is required from the liner. The thicker the liner the more resistance there is to subgrade conditions and the longer the life in the sun. Resistance to rocks in the subgrade can be increased by the use of geotextile under the liner. It has been shown that a geotextile will act compositely with an HDPE liner to give better performance. HDPE is provided with antioxidants and UV stabilisers in its composition. The antioxidants are provided to give protection against oxidation during the manufacturing process and long term. The UV stabiliser is usually carbon black.
  • What colour liner. White liners expand less in the sun than black liners and produce smaller ripples when heated up. If the pond is an evapouration pond and is to be empty some or most of the time then the use of a white liner should be considered.
  • The batter slope and length will also have an effect on the type of liner. Where the batter length is long then the use of a rough-textured liner should be considered to give added frictional restraint to the sub-grade.

Liner type and thickness and configuration is a science on its own and has been the subject of extensive research. When making the call on a liner type consult someone with a background in the subject.

GDT Lining Sysems

GDT Lining has a mission to improve the industrial landscape by containing any harmful waste. We accept that waste is a biproduct of our industrial society. We aim to mitigate the downside to a level which is acceptable, by limiting the spread and effect of waste materials on everyday life.

We are always eager to work with our mining partners in the extraction of products which benefit the quality of life.

GDT Lining Systems has been in operation for over 20 years. We run a crew of up to 15 technicians and undertake projects with a value of up to $(AUD)6.0mil. GDT is located in rural Queensland in the town of Innisfail, approximately 100km south of Cairns. We service customers throughout Australia and Papua New Guinea. We specialise in remote work.

We undertake:

  • Design and Construct work.
  • Supply and install of lining systems.

We work with HDPE, Polypropylene, GCL’s and other geosynthetic products. Our preferred supply partners are:

  • Solamax www.solmax.com suppliers of HDPE
  • Cooley Group www.cooleygroup.com suppliers of polypropylene lining systems

The use of geosynthetic liners in mining applications has been established science for 40 years. Specifically, HDPE has been used extensively as the lining medium for Heap Leach Pads and lining of Tailings Dams. Other geosynthetic applications have included Evaporation Ponds for the reduction of liquid waste. The complexity of the lining system for a particular application depends on the nature of the material being stored or treated. When it comes to the need for liner systems for your industrial waste management requirements, we have the experience to provide meaningful advice.

GDT have designed and constructed many floating covers over; water, molasses, Dunder (Vinasse) and wastewater. We have had extensive experience with gas collection covers.

GDT Lining Systems can design, and construct liner based civil projects in a practical, easy to construct manner. We employ professional engineers experienced in civil and structural design.

GDT has designed and constructed many in-ground molasses storages throughout Queensland in the last 25 years. The largest of which has the capacity to hold up to 37,000 tonnes of molasses. The excavation for this molasses storage is approximately 140m long, 140m wide and 11m deep. As a result of GDT’s experience with Molasses Storages construction, they have become specialised in the requirements to make such a project successful.

WE work from start to finish on your geosynthetic projects.

Get Assistance with Dam Liners from the Experts

GDT Lining Systems have recently completed the construction of a Molasses Bladder Molasses generates CO2 and H2S when stored. Molasses often enters the storage hot and cools of emitting gas as it loses heat. If the gas is not removed from under the cover it will interfere with the roof drainage which may cause the gas flow under the cover to be blocked and large bubbles in the cover system to form.

A large central float with a gas collection pipe system on either side provides positive extraction of the gas by way or an inline industrial fan. Application of a small negative pressure under the cover has a big effect, pulling the cover down against the stored molasses and allowing water that is collected on top of the cover, from precipitation, to find its way to the perimeter drainage sump. Provide perimeter rather than central weights to the system.

GDT has been installing molasses storages for 30 years and has learned about the problems of gas produced.

GDT Lining has a mission to improve the industrial landscape by containing any harmful waste. We accept that waste is a biproduct of our industrial society. We aim to mitigate the downside to a level that is acceptable, by limiting the spread and effect of waste materials on everyday life.

Our Products and Services:

  • Dam Liners
  • Low cost water storages
  • Landfill liners
  • Mining applications including tailings dams, leach pads and acid rock covers.
  • Sewerage Ponds

Contact Us

  • Phone: 07 40617770
  • Email: andrewmaddocks@geosynthetic.com.au
  • Web: www.gdtliningsystems.com.au