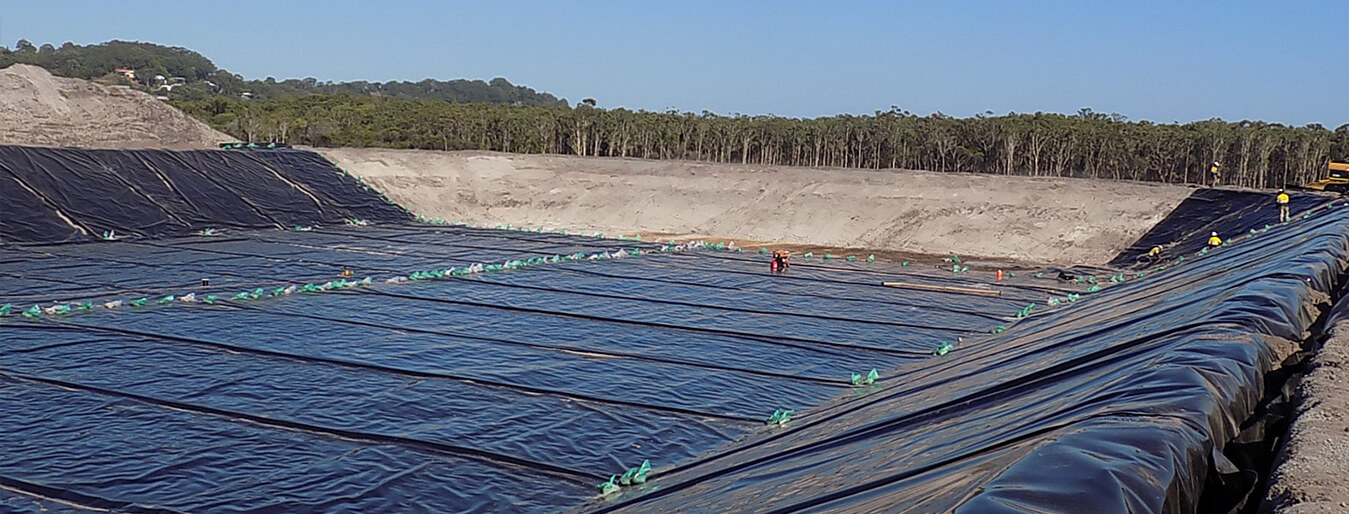
Even the best Dam Liners out there won’t work properly if they’re not installed and tested the right way. Quality control isn’t just something you check off at the end of a project, it’s actually what tells you the material’s holding up, the seams are strong enough, and the whole system’s going to do its job before anything gets put into service. This piece goes through the main quality control tests that come up during dam liner installation, why each one actually matters, and how they all work together to cut down the risk of leaks and keep things reliable for years afterward.
Why Quality Control Is Essential During Dam Liner Installation
▪️Reducing the Risk of Future Failures
Good QC catches problems while they’re still cheap to fix. It stops leaks and seepage before they start, flags issues while there’s still time to sort them out, and just makes the whole system hold up better in the long run.
▪️Ensuring Compliance with Project Specifications
Every project has engineering requirements it needs to meet, and usually regulatory rules on top of that. Quality control’s what actually confirms the installation’s meeting those requirements instead of just hoping it does.
▪️Subgrade Preparation and Verification
▪️Testing the Subgrade Before Installation
Before any liner goes down, the ground underneath needs real attention first. Compaction testing and checking moisture levels tell you whether the subgrade can actually hold up what’s going on top of it. Sharp objects, debris, uneven spots, all of that needs clearing out beforehand, because leaving it there just causes problems later.
Why Subgrade Quality Affects Liner Performance
A badly prepped subgrade is one of the biggest reasons liners end up with punctures or stress points down the line. People tend to treat this part as just prep work rather than an actual quality check, but it needs the same level of attention as anything happening above it.
▪️Material Inspection Before Installation
▪️Verifying Material Specifications
Before installation even kicks off, the material itself needs checking. That means making sure the thickness matches what was actually specified, keeping track of roll identification so everything’s traceable, and going over manufacturer certifications to confirm it’s all what was actually ordered.
▪️Checking for Manufacturing or Transport Damage
Rolls of liner can get damaged before they even show up on site, surface defects, tears, punctures, scrapes from being handled or shipped around. A proper check at this stage, including how it’s been stored, catches this stuff before it becomes a hidden problem later.
Environmental and Equipment Conditions for Installation
▪️Weather Conditions During Seam Welding
Seam quality really depends on the conditions it’s welded in. Temperature, humidity, moisture, all of it affects how well a seam actually holds together. Scheduling needs to account for this, because welding seams in bad weather is a real reason this kind of work fails.
▪️Welding Equipment Calibration
None of the seam testing later matters much if the welding equipment wasn’t calibrated properly to begin with. It needs regular calibration checks, and it needs to be run by people who actually know what they’re doing. This is really what everything else gets built on.
Field Seam Quality Control Tests
▪️Non-Destructive Seam Testing
Non-destructive testing lets you check the seams without actually damaging the liner. Air pressure testing works well for dual-track seams, and vacuum box testing’s another common one, both aimed at spotting weak points in a seam without cutting into anything.
▪️Destructive Seam Testing
Destructive testing actually takes a sample out and puts it through peel and shear strength testing to confirm it can handle real pressure. This doesn’t happen on every single inch of seam, there are set frequencies and acceptance criteria for how often and where this gets done.
▪️Recognised Testing Standards
Seam testing on Dam Liners usually follows recognised industry standards rather than whatever method someone feels like using. Sticking to these standards isn’t just ticking a box, it’s what actually gives a project credibility and keeps it in line with what regulators and engineers expect to see.
Thickness and Dimensional Verification
▪️Confirming Material Thickness
Thickness gets checked against what the project specs actually call for, and staying consistent matters just as much as hitting the right number. Even thickness across the whole liner is what keeps performance predictable.
▪️Checking Panel Alignment
Proper overlap between panels, seams that stay consistent, and keeping wrinkles to a minimum all get checked here. Even small issues at this stage can turn into bigger problems once the liner’s actually under load.
Visual Inspection Throughout Installation
▪️Surface Condition Assessment
Visual checks throughout the whole process look for cuts, punctures, creases, and anything that might’ve ended up underneath the liner before it gets covered or put into use.
▪️Installation Workmanship
Beyond just the material, how well the job’s actually done matters too, proper anchoring, smooth placement without creating unnecessary stress points, and seams lined up correctly, all of this gets checked as the work goes on.
Anchor Trench and Edge Inspection
▪️Verifying Anchor Installation
The anchor trench has to be dug to the right dimensions, and the liner needs to be anchored securely inside it. This is what actually stops the liner from shifting around once it’s dealing with real conditions on site.
▪️Edge Protection
How the backfilling’s done and how well the edges are protected matters a lot for stopping uplift from wind or water. Even a liner that’s installed perfectly everywhere else can get compromised if the edges aren’t secured properly.
Repair and Defect Verification
▪️Testing Repaired Sections
If a defect’s found and gets repaired, whether it’s a patch or a seam that’s been re-welded, that fix needs to go through its own testing too. A repair nobody’s actually verified is just a guess that it worked, and it needs to hold up to the exact same standard as the original installation before anyone signs off on it.
Who Performs Quality Control Testing?
▪️Installation Crew vs Independent CQA
QC testing can be done by the crew doing the installation, or brought in through an independent Construction Quality Assurance team hired specifically for this. On bigger projects especially, having independent third-party testing is often required, or at least strongly pushed for, since it brings a level of objectivity that testing done in-house just can’t fully match.
Documentation and Quality Assurance Records
▪️Recording Test Results
Every test that gets run needs to be written down properly, seam test reports, material inspection records, daily logs from the installation, all of this together builds a full quality assurance trail.
▪️Traceability and Final Acceptance
Roll numbering, test certificates, inspection checklists, final documentation, all of it ties together to confirm the installation’s actually met the standard before final sign-off happens.
Monitoring After Installation
Post-Installation Verification
Quality control doesn’t just end once installation’s done. Leak detection systems and regular inspections after the liner’s up and running help confirm it’s still doing its job over time, instead of just assuming it’s fine because it passed the initial tests.
Common Quality Issues Found During Dam Liner Installation
Some problems show up again and again on these projects. Poor seam welding’s one of the most common. Wrinkles that turn into stress points over time is another. Subgrade that wasn’t prepped properly causes issues that often don’t even show up until much later. Mechanical damage during installation, whether from equipment or just careless handling, comes up a lot too. And incomplete testing or missing documentation leaves gaps that can turn into real liability if something goes wrong down the road. Keeping an eye out for these throughout a Dam Liners project goes a long way toward avoiding expensive problems later.
Frequently Asked Questions
a.How are dam liner seams tested for quality?
Seams get tested both ways, non-destructive methods like air pressure and vacuum box testing, and destructive methods like peel and shear strength testing on samples, to confirm they actually meet the strength and integrity standards required.
b.What happens if a seam fails testing?
It gets repaired, usually through re-welding or a patch, and then tested again to confirm the fix actually holds up to the same standard as the rest of the installation before it gets accepted.
c.How long does QC testing typically take during installation?
Depends on how big the project is and how many seams are involved, but generally it runs alongside the installation itself rather than being some separate phase tacked on at the end, so it adds time gradually instead of all at once.
Conclusion
Proper quality control testing is genuinely a critical part of any Dam Liners installation project, it’s what actually confirms the material’s good, the seams are solid, and the workmanship holds up before the system’s ever put into service. Bringing together material inspections, both non-destructive and destructive seam testing, ongoing visual checks, and proper documentation makes a real difference in how the system performs down the line and cuts down the odds of expensive repairs later. If you’re managing a project that involves dam liners, it’s worth working with suppliers and installation teams, like GDT Lining, who actually know what they’re doing and follow proper quality assurance procedures at every stage, not just at the end.
Copy Right 2018
Powered By : Onqanet technologies